
-This post may contain affiliate links-

One of my favorite things about the Cricut Joy is how easy it is to make cards for any occasion. When Cricut Joy first came out insert cards came out at the same time. I thought they were a really neat way to make cards, mostly because I'm not a huge paper crafter. I enjoy simple paper projects, but I am not the place to come for amazing, complex cards that use lots of different techniques. If is is beyond gluing a couple of pieces of paper together it is probably not for me.

The one problem with insert cards is that everything has to be connected, like a stencil. You can't have any letters with center pieces, like an A or an O, unless you have a little piece connecting the center to the outside.

The new cutaway cards solve this problem in a pretty cool way. Instead of adding the insert into slots in the corners there is an adhesive inside the card that the insert sticks to. Then you cut out your design, pull out the pieces that you cut out and you are left with the insert showing through in those places. But the little center of your o, or the pieces of your butterfly's wing, or whatever other little inner pieces you have stay stuck in place.

I was excited to try them out so I ordered a few different packs and made some cards. In addition to just cutting out your design you can also add writing with a pen, or even foil with the foil tool. The foiled card might be my favorite. But however you choose to make it you can have a card in no time at all. And since you aren't limited by what images and fonts you can use you can create a card for any occasion and in any style.

How to Make Cricut Cutaway Cards
You will need:
Instructions:
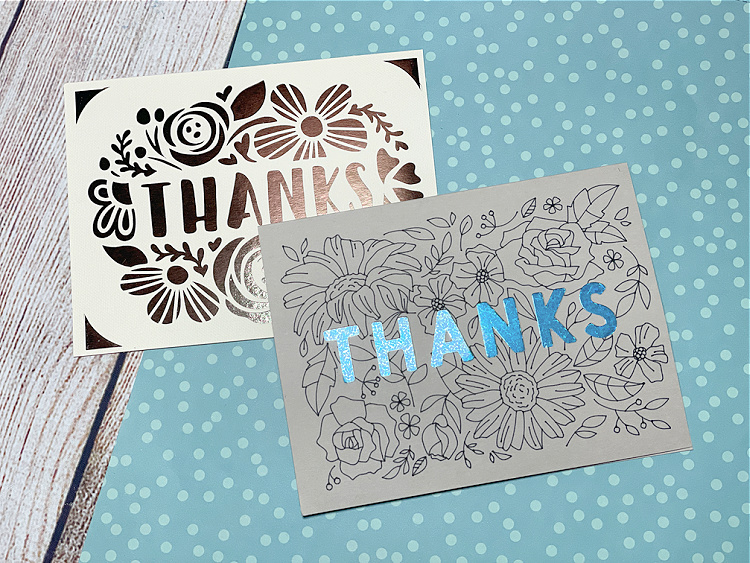
To begin you will need to decide on the designs that you want to use for your cards. I found some designs available in Design Space when I looked under cutaway cards. That is where I found the Mom card design (the lines were originally drawn with a pen and I changed to foil), and the Thanks with the drawn flower design.
Another fun option is that you can create your own card designs. The cards that I made this way I made using the Cricut Joy app. There is an option to create your own cutaway cards and it shows you exactly what it will look like. You can add any images or text you want, or even add writing lines. This is the way I made the baby card, the birthday card, and the butterfly thank you card. It was so easy to insert the images and text and design the cards.

Once you have your design chosen you are ready to make your card. Just follow the prompts on the screen, whether you are using the Cricut Joy app or Design Space.
You will start by peeling the cover off the adhesive inside the card (this will be the inside of the front of the card). Place the insert piece colored side down on the adhesive.
Peel the protective sheet off the card mat and slide the back of the card under the flap.
If you are using foil- tape the foil sheet to the top of the card and put the foil transfer tool into the machine.
If you are using a pen- load the pen into the machine.
If you are only cutting just leave the blade.
Follow the prompts to cut, draw, and/or transfer the foil to the card.
When you are done with all steps unload your mat. Pull off the cutout pieces to expose the insert card. You may find it helpful to use a weeding tool to help pull up the edges of the pieces, just be careful not to scratch the insert card.
Super simple and fast to make!

No comments :
Post a Comment