
-This post may contain affiliate links-

A new month means another Team Creative Crafts collaboration and this month the theme is back to school crafts. It is crazy to think that summer is already coming to an end and kids are heading back to school soon, or in some places already have. My kids head back in a couple of weeks and we have been spending a lot of time lately getting things ready, going to registrations, school shopping, and attempting to get back in a good routine for the school year.
I have been working on some back to school crafts to share over the next week, even though I know that is probably too late for some. One of these days I may get things together enough to get projects shared further in advance, but this is not that day.
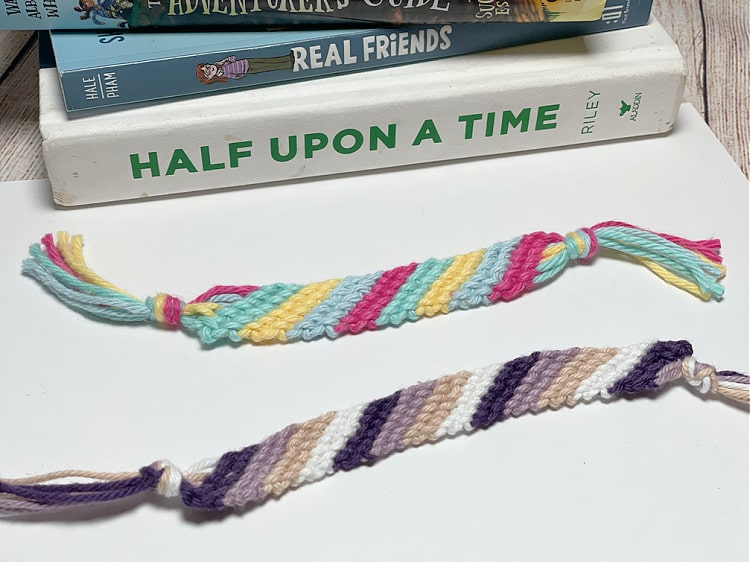
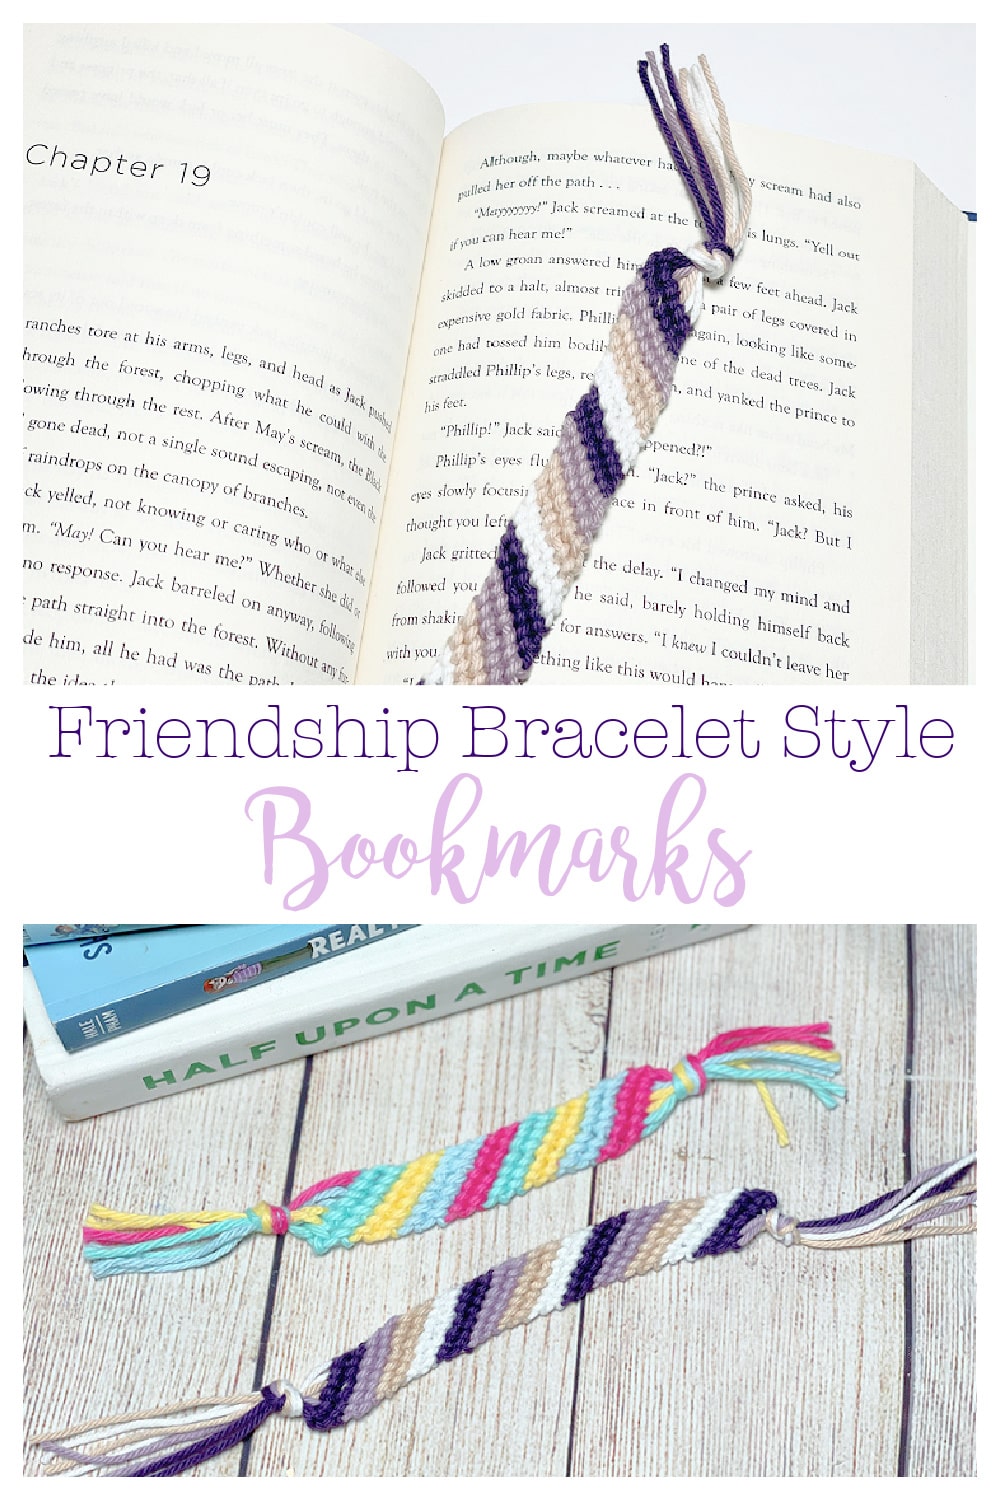
For today's project I decided I wanted to make some bookmarks and I wanted to use yarn to make them, but I didn't necessarily want to crochet them. I once took a class where we made macrame keychains and I was kind of thinking of that and wondered if I could do something like that but as a bookmark. Then I thought of friendship bracelets and realized that that is basically the same thing, tying knots in thread to make a design.

To make friendship bracelets I would normally use embroidery floss which is pretty thin, so to make these bookmarks a little bit bigger I traded out the thread for cotton yarn.

I chose to use 8 strands of yarn for each bookmark, with 2 strands of each color. The design I used makes diagonal stripes and using both strands of each color in a row made the stripes 2 rows thick. You could easily change up the order for a different look, or even add more strands for a thicker bookmark.

I knotted both ends for a tassel type look on each end, but the knot is a little thicker than the rest of the bookmark so you could just leave the strands hanging on the end for more of a fringe look on that side, which will keep it a little flatter inside of the book.

I remember as a kid in school pinning a knotted bunch of embroidery floss to my pants and making friendship bracelets, so this is kind of a fun, nostalgic craft to make while preparing to send my own kids back to school.

As usual be sure to check out all of the fun back to school crafts being shared today!

Laura from Me and My INKlings has created a set of hand drawn and water colored Back-to-School Lunchbox Notes that are available to download for FREE!
Create the cutest DIY Pencil Case made with felt and embellished with a strawberry. Smitha from Smiling Colors has the full tutorial on her blog.
Shani from Sunshine and Munchkins is sharing the CUTEST Back-to-School Pencil Wreath created from yarn. Fun for the classroom door!
Download and print a set of Lunchbox Notes to inspire the kiddos during back-to-school time. Head over to Laura’s blog Laura’s Crafty Lifeto get the Free Printable.
Justine from Little Dove has created the cutest DIY Apple Garland from book paper. What a cute way to decorate the classroom for back-to-school.
Make a fun Friendship Bracelet Style Bookmark for your bestie with this step-by-step tutorial from Erica of 5 Little Monsters.
Kelsey of Poofy Cheeks is sharing a fun DIY Pencil Sign with the FREE SVG Cut File. The perfect back-to-school teacher gift.
Make sure to keep all the kids school supplies organized with Personalized Notebooks. Get the editable sublimation files from Katie over on the Crafty Blog Stalker.
Chelly from We Can Make That is sharing the cutest SVG Cut File to create a Home Sweet Classroom Clipboard for that special teacher.
Create a fabulous back-to-school gift for your new teachers with Lindsay’s Resin Pencil Keychain tutorial over on her blog Artsy Fartsy Mama. Makes the perfect backpack charm too!
Beth from Creatively Beth is channeling her inner Dad Jokes with a set of Punny Lunch Notes to keep the kiddos in stitches.
Hydration is super important, so do it in style with Personalized Water Bottles. Marissa of Rae Gunn Ramblings has the full tutorial on her blog.

How to Make Friendship Bracelet Style Bookmarks
You will need:
- Cotton yarn in multiple colors (I used 4 colors of Dishie or Sugar n' Cream yarn)
- scissors
- safety pin, tape, or other way to fasten the bundle of yarn as you work
Instructions:
These would make cute little gifts for friends on the first day of school. -Blanca Creativities Galore
ReplyDelete