
-This post may contain affiliate links-

It is not only a new month but a new year too! I kind of took an unplanned month off in December from blogging. My family, like pretty much everyone else it seems, got hit pretty hard by sickness last month, then we had a busy schedule of Christmas parties, winter programs, and end of the year concerts, followed by having kids home for the break. I feel like I had a hard time finding not only time, but also motivation and ideas to make stuff. But now I am ready to be back to crafting after taking a break, and I am excited to share some new projects with you.

Today I am joining with Team Creative Crafts on the first collaboration of 2023, this month the theme is organization crafts.

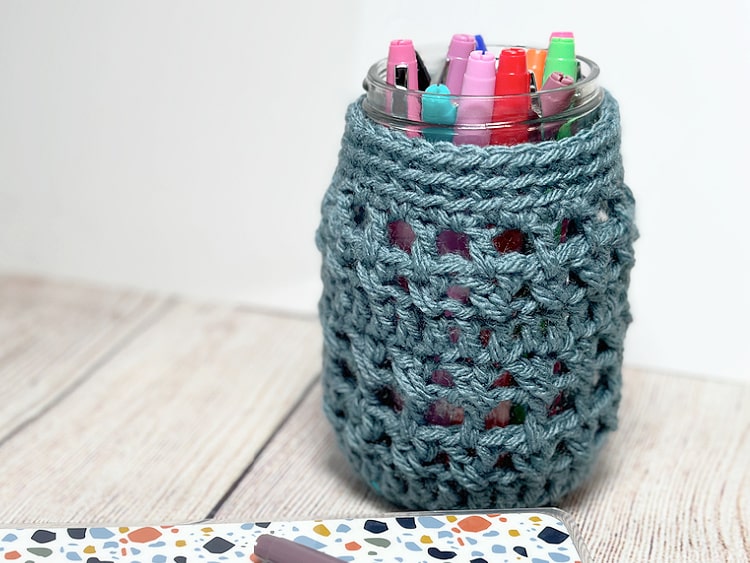
When I get myself in a bit of a crafting funk I find that one of the best ways for me to pull myself out of it is to make a really quick craft. Something that I can finish fast and feel that sense of accomplishment that comes with finishing a project. So I decided to make a quick jar cover for this project.

Mason jars are a great storage container, I have used them for holding pens, pencils, paintbrushes, crochet hooks, etc. But crocheting a little cover is an easy way to turn it from a plain glass jar to something a little prettier.

Last year I made a trio of jar covers using three different basic stitches, for this jar I decided to use a slightly more complex stitch pattern. It still uses basic stitches, but rather than using the same stitch throughout the whole cover I used a pattern that uses a few different stitches. I used the same stitch pattern that I used in several other patterns, including my Aurora Hat and Scarf, water bottle holder, and market bag.

The scarf was my first project with this stitch pattern and I chose the name Aurora based on the colors used in that project, but since then I have just stuck with the name with everything else I have used it for. It uses a combination of Double Crochet, Crossed Double Crochet, and Double Crochet Mesh stitches. The jar cover is finished with a few rows of single crochet worked in the back loop to give a ridged edging.
Be sure to check out all of the organization themed projects shared today!
Is your fabric stash taking over your whole studio? Learn Easy Fabric Storage Ideas with Dollar Tree Supplies from Laura at Me and My INKlings.
Gather all those tools in one place in your studio so they are right at hand with a gorgeous Stenciled Craft Tool Organizer created by Lindsay at Artsy Fartsy Mama.
Organize all your crafty and DIY plans with this two page Free Printable Craft Project Planner from Beth at Creatively Beth. Download available in color and black and white.
Organize this mostly forgotten space with Laundry Room Labels made with Cricut Vinyl. Laura from Laura’s Crafty Life has the full instructions.
Keep your yarn neat and organized by project in the new year in a Crocheted Basket with Free Pattern created by Smitha at Smiling Colors.
Use these Free Motivational Planner Stickers to help you stay organized and give you a little boost during the week. Download the set from Shani at Sunshine and Munchkins.
Get motivated with this fun Free Printable Organization BINGO Game for kids and adults. Justine at Little Dove understands that everything has its place.

How to Make the Aurora Crocheted Jar Cover
You will need:
- Worsted Weight Yarn (sample made with Loops and Threads Impeccable in Misty Blue)
- I Crochet Hook (5.5 mm)
- Pint Size Canning Jar
- Yarn Needle
Instructions:
Round 1: in mr, ch 2, 10 dc, join to first dc with sl st (10 dc)
Round 2: ch 2, 2 dc in each st, join to first dc with sl st (20 dc)
Round 3: ch 2, [2 dc in first st, dc in next st] repeat around, join to first dc with sl st (30 dc)
Round 4: ch 2, 1 dc in each, join to first dc to join (30 dc)

No comments :
Post a Comment