
-Sponsored by Cricut. This post contains affiliate links-

Obviously the first thing that you will need to make Cricut projects is a Cricut machine but once you have that what else to you need, how many other supplies do you need to get started? Part of my answer to that question really depends on the projects you are planning on making however there are a few things you will need no matter what.
- Mats- You will need mats. There are different sizes and levels of stickiness so which mat you need may depend on the projects but whichever ones you choose you will need these.
- Blades- Your machine will come with a blade so you won't need to get one right away but this is something that will need to be replaced from time to time.

Next there are some things that you may need depending on the project.
- Pens- I believe the Cricut comes with one black pen, if you are doing projects that will use the write and cut feature you can get a variety of different pens, differnent colors, different thicknesses, etc.
- Scoring Tool- This is something you will want to get if you are making a lot of paper crafts, things like cards that will require scoring. The scoring tool fits in the same way as the pens.
- Scissors- This is something you surely already have but you will likely want to have on hand as you work on you projects. You will use them trim down the vinyl after you cut it or cut a piece of transfer tape, etc.

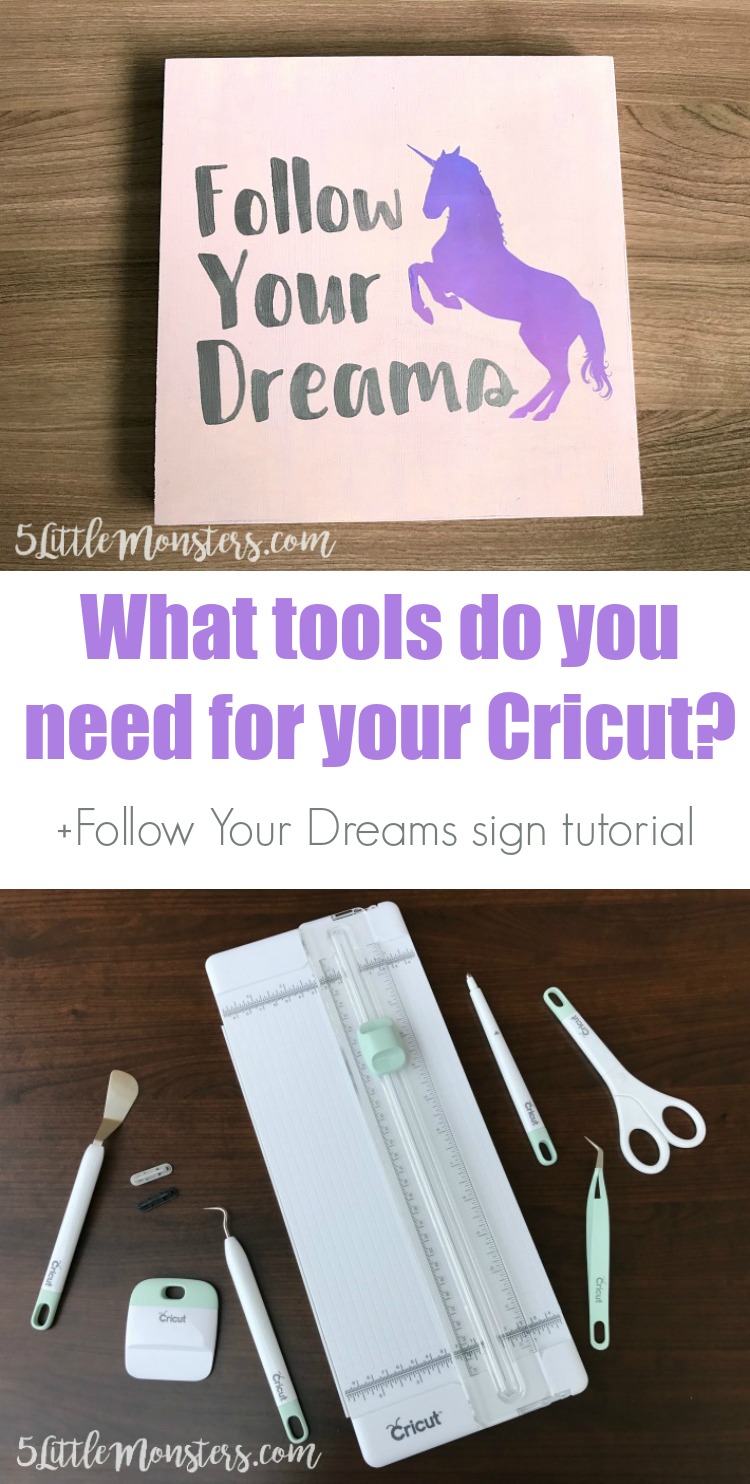
There are several other things that may not be absolutely necessary but are kind of nice to have. Cricut has several different tool sets available that have some of those tools in them. I have the Essential Tool Set in Mint, it matches the Explore Air 2 and also comes in blue or rose. It comes with a pair of scissors and the scoring tool I mentioned above. It has a paper trimmer in it, which I love, as well as an extra trimmer blade and a scoring blade and there is a place on the bottom to store the extras. It also has tweezers, a weeder (a little pick type tool that helps remove tiny pieces when you are weeding), a little spatula to help lift things off of the mat, and a scraper which is really great for rubbing vinyl in place as well as cleaning all of the little bits off of your mat (I especially like to use it for that when I am cutting cardstock). They also have a Basic Tool Set that includes everything but the trimmer, and you can also buy the tools individually. There is also a Paper Crafitng Tool Set available that has tools for quilling, distressing and punching holes.

The other important thing you will need is the material that you are cutting. There are so many materials that you can cut, from all of the different types of vinyl, to paper and cardstock, to iron on, leather and foam, and so many more. As I was thinking of a project for this post I wanted to do something that would use a couple different products that I hadn't used before, as well as different techniques. I ordered some fun holographic vinyl (I chose the Opal color), and some stencil vinyl. I have used my Cricut to cut stencils before but I hadn't ever tried it with actual stencil vinyl and I wanted to try it out. I wanted to do something that combined paint and stenciling with vinyl so I came up with a sign that I thought would be cute in a little girls room.

Follow Your Dreams Sign
You will need:
- a wood canvas or plaque (I picked up a 10" x 10" board at Walmart for less than $5)
- paint in colors desired colors for base and lettering (I used some I already had, Martha Stewart Satin in lavendar cloud for the base, and Flok Art Brushed Metal in brushed silver for the lettering)
- foam paintbrush
- Cricut Explore (I have the Air 2)
- mat
- Holographic Vinyl, Opal
- Stencil Vinyl
- Transfer Tape
- scissors
- a weeder and scraper are also helpful tools to have for this project

Instructions:
Paint and prepare your board.
Now the first thing you will need to do is create your design. Mine is made with some Cricut elements and some that I purchased myself. As a result I can't share the file but I can explain how to do it yourself. I uploaded my own unicorn image (you can see how I did that in this post), because I liked it a little better than what was available through Cricut Access although you cn use one of those and it will work just fine. The unicorn I used is part of a graphic pack that can be purchased through Creative Market. That is probably my favorite website for graphics and fonts, they even have freebies available every week.
Once I chose the image I wanted I added my text. I used Karley which is a free font if you have Cricut Access. I wrote Follow Your Dreams with each word on a separate line and all aligned on the right. One thing that I really like when I am adding text in design space is that you can adjust the spacing between the lines. Make sure that you attatch your text so that the layout stays the way you want it when it is time to cut it out.

Once you get your text the way you want it you can play around with the placement and sizing of the text and image until it is what you want. Another little tip is that if you have everything looking the way you want but you need to adjust the size so that it fits what you are putting it on you can select all, then right click and hit group. That will allow you to size it all together rather than resizing the text, then the image and trying to get it all right again. Then ungroup it when you have it the way you want it. Make sure that you text and image are two different colors, this tells your machine you want them cut out of different materials.
Cut the unicorn from holographic vinyl and the words from the stencil vinyl. Both of these materials have custom settings specific to the material. When I cut mine I looked in the custom settings and saw stencil so I set it to that and cut. Big mistake. I tried to peel it off and this happened:

That is not what it is supposed to look like. The stencil setting is not for stencil vinyl. The correct setting is vinyl, stencil. Just so that no one else makes the same mistake I did.
Once you have your stuff cut out, cut the piece off that has your image then weed. Remember when you weed your stencil that you want to remove the actual letters and leave a border around the edge. Use transfer tape to remove the stencil from the backing.
Lay the vinyl on the board to determine placement. Then set aside the unicorn. Press the stencil into place and peel off the transfer tape. Press down the stencil so that it is stuck down really good and you don't have any bubbles. Paint over the stencil. Carefully remove the stencil. Let dry. Apply the unicorn vinyl.

Have fun creating your own designs. Do you have a favorite tool that you like to use for you Cricut projects? What is it? Also, if you want a better look at what the holographic vinyl looks like check out the quick little video I posted on Instagram.
This is a sponsored conversation written by me on behalf of Cricut. The opinions and text are all mine.
The holographic vinyl is perfect for unicorns!
ReplyDelete