
-This post may contain affiliate links-
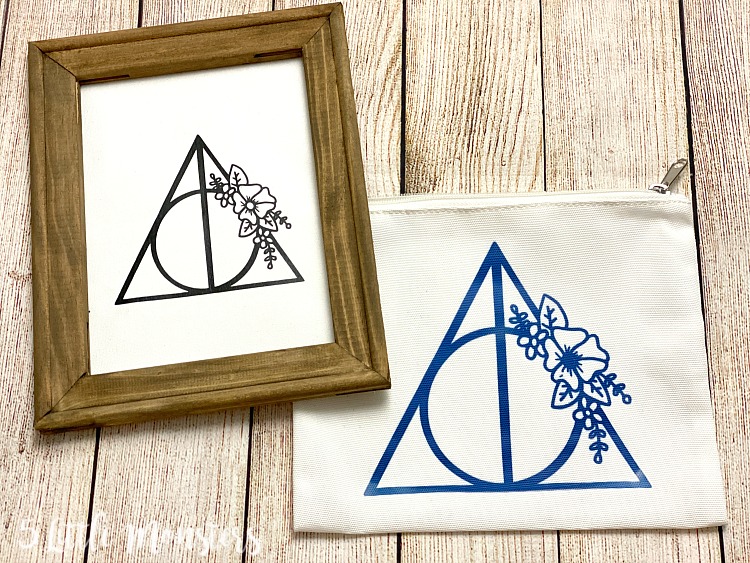
Surprise! It is another Harry Potter project! This one is a design that I drew, uploaded to Design Space and turned into a cute little zipper bag and reverse canvas. It is so fun to take a project from idea to finished product and this one went a totally different direction than I had originally planned.

I actually had a shirt planned for today, one that I had designed years ago and never made. Then a couple of weeks ago I participated in a Harry Potter themed blog hop and one of the projects that was shared by another blogger was almost identical to the shirt I was planning on making. It was similar enough that I decided against sharing it this time, and wanted to come up with something different.

I pulled out my iPad and started doodling and I drew this Deathly Hallows symbol with a little floral doodle on the side. I kind of liked how it turned out so I decided to use it for my project.
I think it would look cool on a shirt but I didn't have a shirt in a color or size that would work and didn't feel like going to the store, so instead I made a little cosmetic zipper bag using Cricut's new Infusible Ink blanks and Infusible Ink, and a reverse canvas using black iron on.
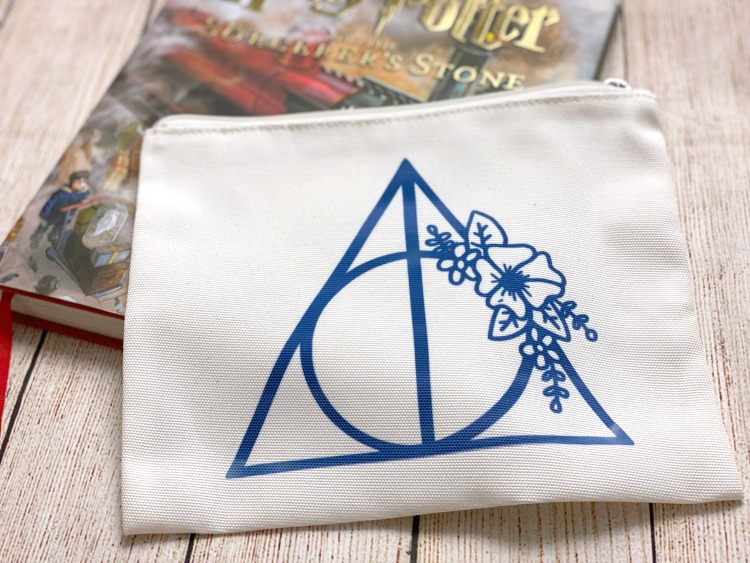
I thought the zipper bag turned out pretty cute, minus a couple mistakes that I made, like forgetting to weed the center of the big flower, and having a little speck on one of the petals. But I didn't absolutely love it, because those little mistakes stood out so much to me.

I made the bag first and because I liked it, but didn't love it, I decided to give the design another try so I made a quick reverse canvas. Besides, I kind of wanted to show that you could put it on anything. I love the way it turned out on the canvas, but I also think it would look cute on a shirt, on a notebook cover, a wooden sign, etc.

You can upload the design into Design Space if you are using a Cricut (which is the only one I have experience with so the only one I can give specific instructions on) or other cutting machine software and cut it out of iron on or vinyl and add it to whatever you want.

How to Use the Floral Deathly Hallows Design
You will need:
For either project
- Cricut or other cutting machine
- Floral Deathly Hallows file
For Cosmetic Bag
- Cricut Infusible Ink transfer sheet in desired color (I used blue from Brushed Sunset)
- Cricut Infusible Ink compatible Cosmetic Bag (there are 3 in the set and I used the largest size)
- EasyPress 2
- EasyPress mat
For Reverse Canvas
- a blank wrapped canvas (I used 8x10)
- paint or stain (I used Folkart Acrylic in Raw Umber)
- paintbrush or wet wipes
- Everyday Iron On in black (or desired color)
- EasyPress 2
- EasyPress mat
- glue gun
Instructions:
Open the Floral Deathly Hallows file, save it to your computer, and upload it to Design Space or the software you are using.
To do this in Design Space open a new project and click on upload (bottom left if on a computer), then click upload image and select the image from your computer. The image is saved as a .png file with a transparent background which makes it super easy to upload because you don't need to erase or clean up anything. You can click on simple, then it will bring you to the screen where you can erase the background, just click to the next screen and save it as a cut file. Now it will show up in your uploaded images, add it to your design and you are ready to go.
Cosmetic Bag
Measure how big you want the design to be and resize to the right size.
Cut the design out of Infusible Ink, don't forget to mirror your design. Weed the cut out design.
Use a lint roller to make sure the bag is clean then layer a piece of cardstock inside of the bag, the design face down on the bag, then butcher paper, and press according to the instruction found in the heat guide (385 degrees for 60 sec). Remove the EasyPress and carefully peel back liner to see your finished bag.
Reverse Canvas
Remove the canvas from the frame it is wrapped around.
Paint or stain the frame, I used the baby wipe method to get a stained look from regular acrylic craft paint. I squirted a little paint onto the frame and then used a wet wipe to wipe on a thin layer, repeating until the frame was completely painted. Set aside to dry.
Measure the space inside the frame to determine how big to make your design. Mine was a little over 5x7 so I made the widest part 4.5" wide.
Cut the design from iron on, don't forget to mirror, then weed.
Center on the canvas and press.
Trim the canvas so that it is slightly smaller than the outside of the frame. Glue the canvas to the back of the frame with hot glue (or you can staple it back on, but I find the glue works fine and is easier).

No comments :
Post a Comment