
-This post is sponsored by Cricut, all ideas and opinions are my own-

There are so many different things that you can do with the Cricut. The first thing that comes to mind is cutting, whether it be vinyl, iron-on, cardstock, or something else. It is a cutting machine so that is obviously the main thing that it does, but did you know it can do a lot more than just cut? It can also write, and score. You can even do one of those things at the at the same time as you cut, without ever stopping the machine. There are also other features like print and cut. If you haven't tried some of these features you may wonder how they work. Today I want to show the write and cut feature and how you can use it to make some little tags. It is a really easy project that has a lot of practical uses and once you learn how to do it you can use it to make lots of different projects. The tags come in handy for gifts. I have also use them to label crocheted hats with the sizes. Also, I will have a video showing how to do this soon, I was working on one but had some issues so as soon as I get it ready I will add the link here.

First of all you will need to gather up your supplies, including a Cricut pen. They come in lots of colors and sizes, I used a fine point black pen. Other than that you just need some cardstock and the normal Cricut supplies (your Cricut, your computer, a mat).
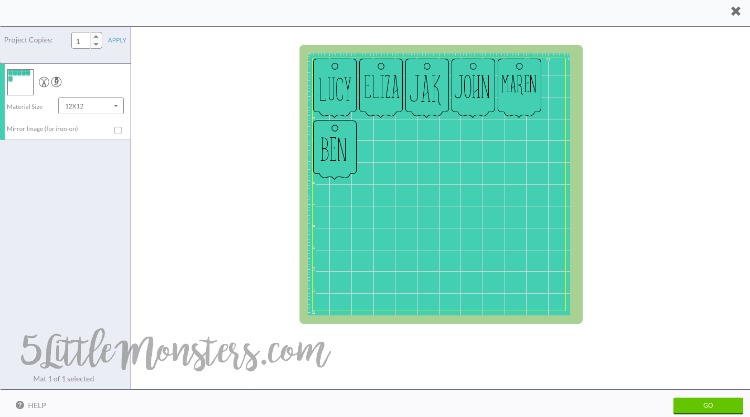
Open up a new project in Design Space and click on insert images. Search for tags and pick a design. Add as many as you want. I find that the easiest way to do that is just copy and paste until you have the number of tags you want.
Next you will want to add the words that you want written. Click add text and write the word that you want, then click on edit and the drop down box where you can pick the kind of fonts you want to choose from. Click on "has a writing style" and choose the font that you want.

Place the word on the tag where you want it to be. Then click and drag the arrow over the tag to select the tag and the word. Click on layers and then click attach. This will attach the tag and the word together so that when you go to write and cut everything will be in the right place. If you click on the tag to move it around or resize it at this point the word should move with the word.
Once you have all of the words on all of the tags you are ready to cut them out. Click Go just like you would to cut anything out. Make sure you select the right material and get your mat ready with your cardstock. As you get ready to cut it will prompt you to insert the pen. You will put it into the opening next to the blade (A). Push it down until it clicks in place. Then hit go.
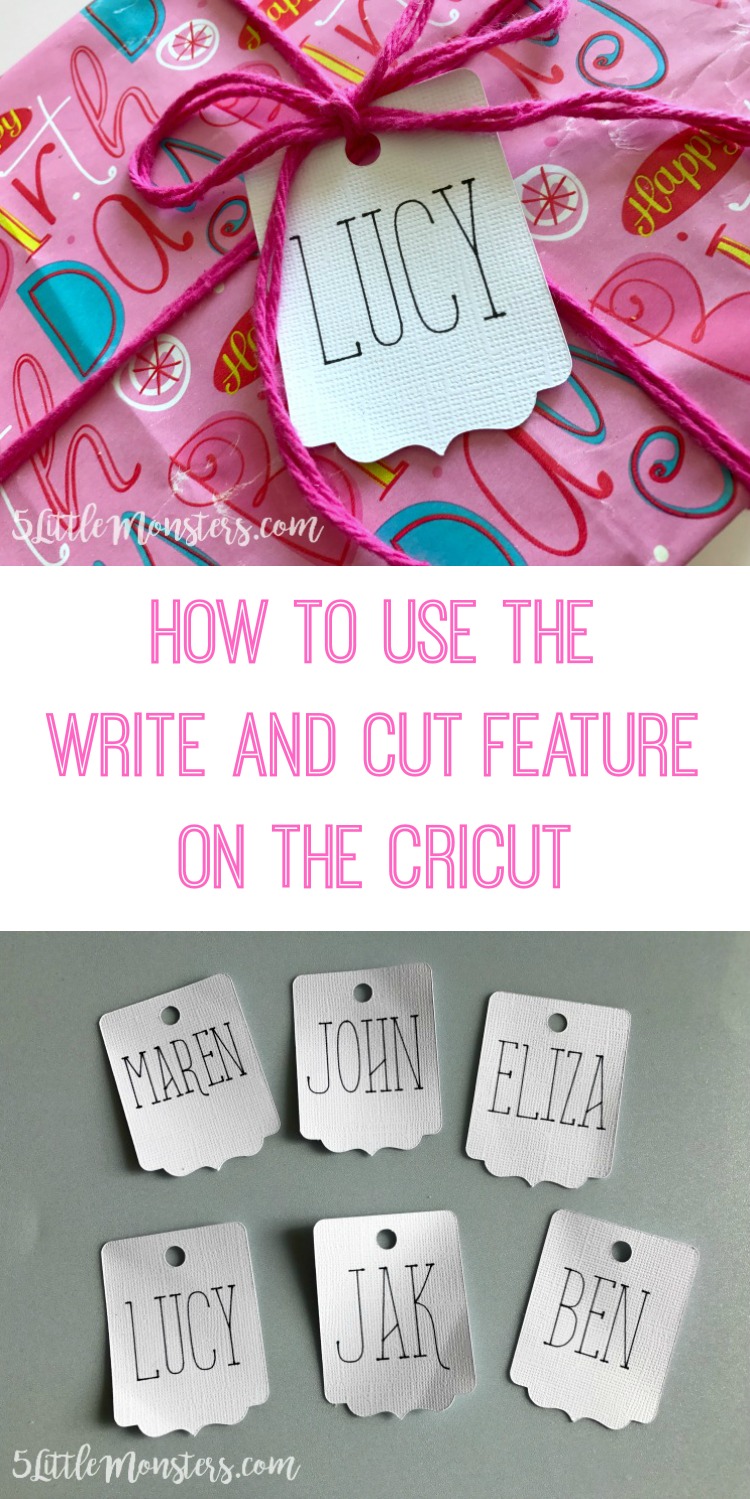
Watch as the pen writes all of the words, then when all of the words are written the the cutting will start. No need to do anything the Cricut just does it all at one time. Remove the tags from the mat when you are done and add them to a gift or whatever you are using them for.

You can use the write and cut technique for lots of things besides tags, it is great for cards too. They look like they are perfectly handwritten when in reality the Cricut did all the work for you.
This is a sponsored conversation written by me on behalf of Cricut. The opinions and text are all mine.
No comments :
Post a Comment