
-This post may contain affiliate links-
I had the opportunity to try out the new Cricut Hat Press and I had a lot of fun with it. I enjoyed choosing designs for the hats and then actually making them. I have tried making hats in the past and it was super tricky. Trying to deal with the curved shape of the hat was a big challenge.
One of the biggest problems that I found as a result of the curved hat shape was having something hard inside to press against. It isn't like a t-shirt that you can place flat on the floor and press. I tried to roll up my EasyPress Mat and shove it inside to press against and it kind of, sort of worked, but it wasn't great.

Then you have the problem on the outside of a curved surface that you are pressing on with a flat iron or press. I would use my EasyPress Mini since it was small enough to move around to different areas so that I could make sure everything was pressed on. But again, it kinda worked, just not without frustration.

In fact, after making a hat and having a lot of struggles with it I kind of decided hats weren't for me and I probably wasn't going to be making any more hats.
So when I first saw that Hat Press I wasn't sure what to think. On the one hand I had kind of sworn off hat making, but on the other hand maybe this would solve the problems I had and make it a much less frustrating process.
I decided it was worth a try. I found that it was such a smooth process. Nothing like the frustrating experience I had had before. My favorite part of the Hat Press is the pressing form. You stick the hat over it and you can easily hold it while have a nice firm, rounded shape to press you hat on. That had been the worst part of hat making in the past and this fixes that problem perfectly.
The other part of the problem is solved by the curved pressing plate. It fits nicely over the hat and easily presses the designs where you want them.
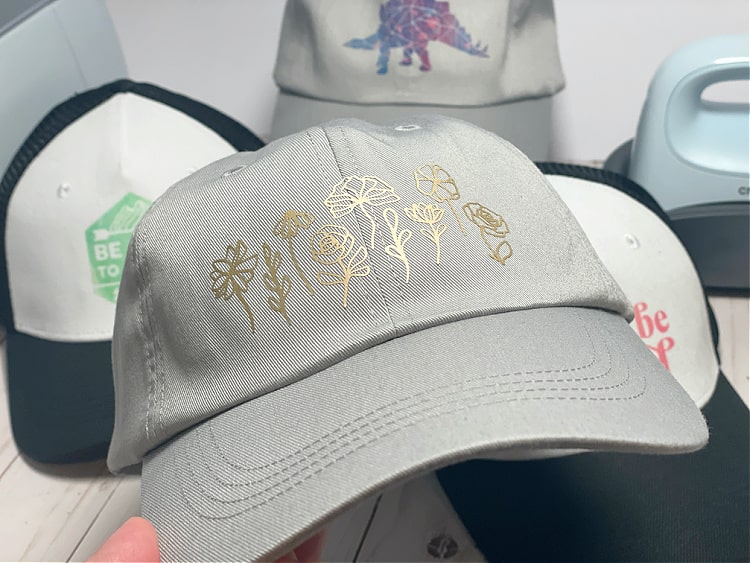
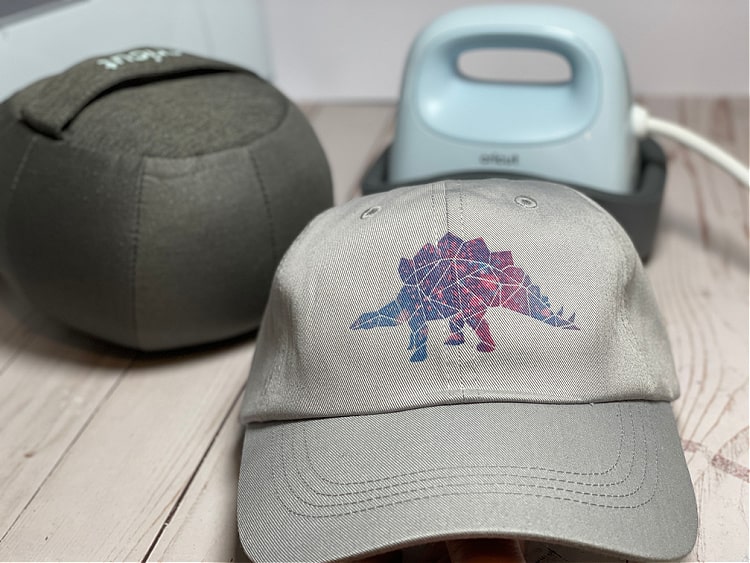
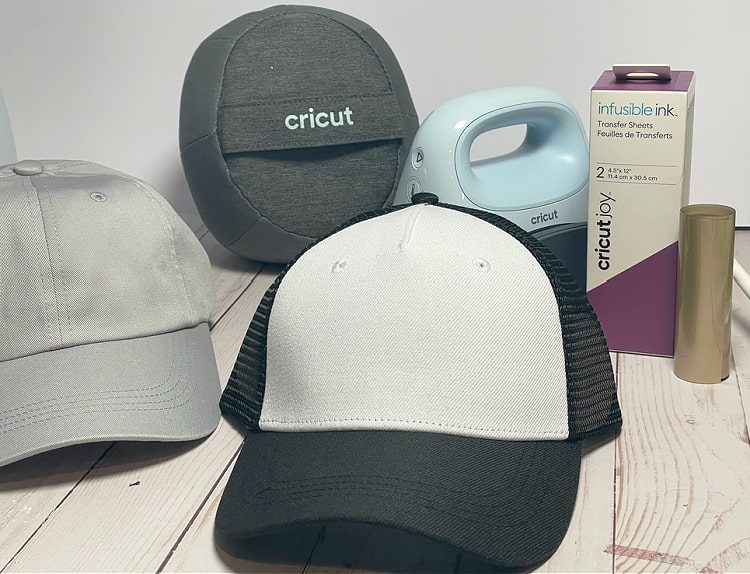
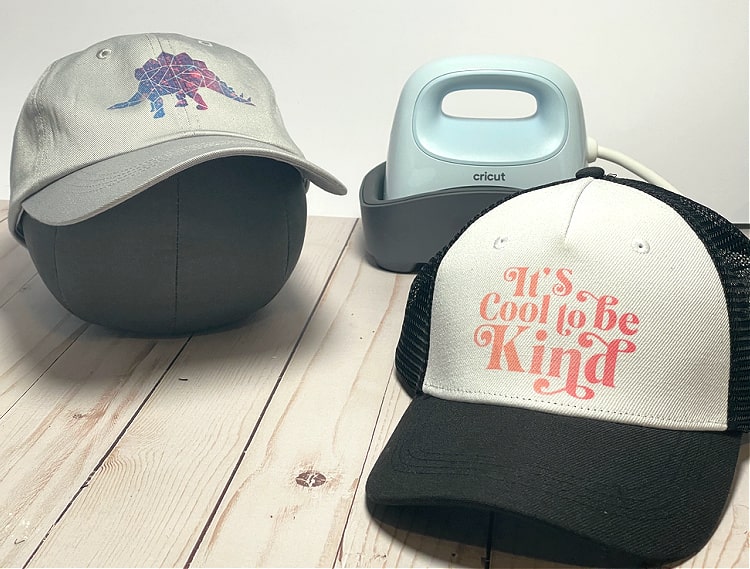
The other thing that I really enjoyed about this project was the fact that the 2 Cricut blanks that I used, the ball cap, and the trucker hat, are both Infusible Ink compatible. I really like the patterned Infusible Ink transfer sheets so I was happy that I could use those on the hats. Although you can also use iron on, like I did on the hat with the gold flowers.
How to Make Hats with the Cricut Hat Press
You will need:
- Cricut Maker, Explore, or Joy (I used my Cricut Maker 3)
- Hat Press
- Trucker Hat or Ball Cap
- Iron On or Infusible Ink in desired colors (the small size work great for this project, but of course you can use any size roll)
- Cricut Heat App
Instructions:
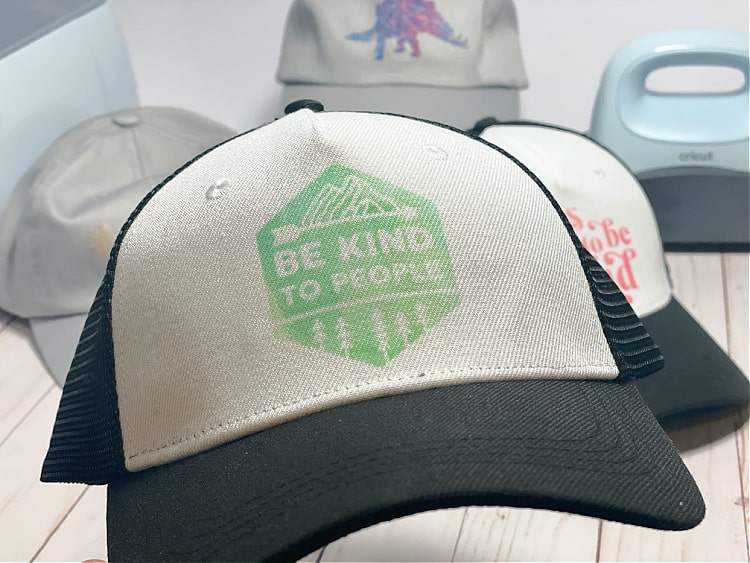
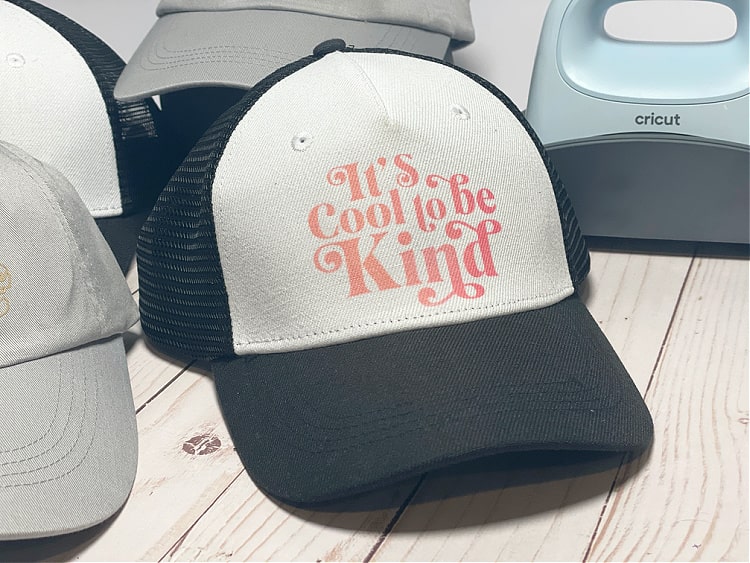
Begin by choosing the designs that you want. I found designs in Design Space by searching whatever type of design I wanted, like "dinosaur", "be kind", or "flowers". I tried to find designs that were small, fairly simple designs that would fit well in the space on the front of a hat. You could definitely do multi-layer designs with more than one color, but I chose to do single layer designs to keep it easy.
Resize the designs to fit the space on the front of the hats. I measured the hats to figure out the size that I wanted, each one was a little different because of the different dimensions of each image but I kept mine between 2"- 4" wide and 2"- 2.5" tall.
Once your designs are resized you are ready to cut them out. Be sure to mirror your designs before cutting.
Weed the cut designs.
Use the Cricut Heat App to set the time and temperature on the hat press. Select the material you are pressing (Infusible Ink transfer sheets or iron on) and what you are pressing (if you are using the Cricut Ball Cap or Trucker Hat those are both options you can select, otherwise select the the base material).
Undo the back strap on the hat and flip out the sweat band, then pull the hat onto the pressing form making sure that it is smooth under the spot you will be pressing.
Follow the prompts on the app to press the design onto the hat. You will preheat for 5 seconds, then use the strong heat tape to tape your design securely to the hat. If you are using Infusible Ink you will also need to tape butcher paper over the design.
When pressing the design you will move the press back and forth over the design using light pressure (at least for the materials I used, but follow the prompts for the materials you select).
Pull off the transfer sheet and reveal your new hat.

No comments :
Post a Comment