
-This post may contain affiliate links-
I cannot believe it is already May. This year seems to be flying by, but maybe that is just me. But a new month means another Team Creative Crafts collaboration. I really enjoy these challenges because it forces me to come up with something that I would probably not otherwise think to do. This month's theme is Tie Dye.
I have done a few tie dye projects on my blog before and I really wanted to try something I hadn't done before. A new type of dying or a new something that I hadn't dyed before. I have tie dyed pillows, onesies, masks, and scrunchies, so I didn't really want to do any of those.

I have always thought the patterns of Shibori dying looked really neat, so the project I decided on was tie dyed swaddle blankets inspired by Shibori dying.

Shibori is an indigo dying technique from Japan uses certain types of folds, binding, and wrapping to create designs on fabric. Because it is typically done with indigo the designs are usually a deep blue color and they are also usually submerged in the dye, vs. tie dye where it is typically squirted onto the fabric you are dying.

There are some types of folds and wraps that are commonly used with Shibori dying that create the patterns and designs often associated with that type of dying. I am not an expert but there are a few designs that I know I often associate with the style.
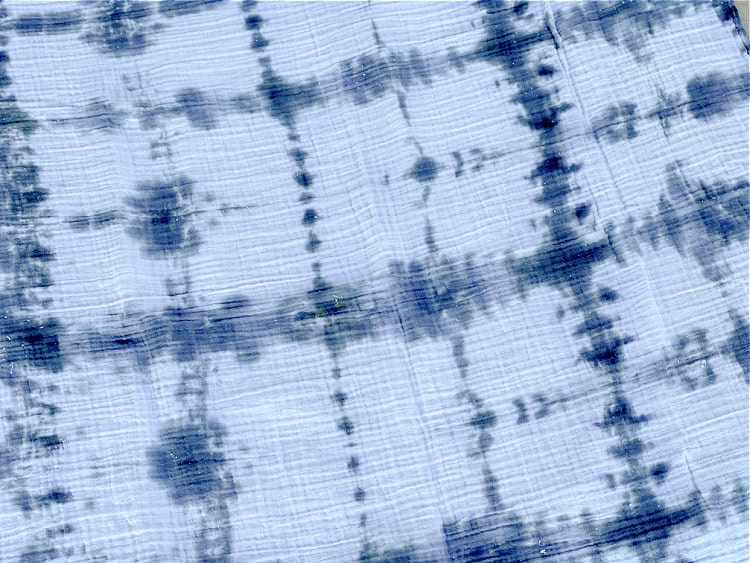
I chose 4 different designs to try for the swaddle blankets I made. The first style that I wanted to try was a shape resist. This is probably the number one style that I associate with Shibori. It creates white spaces, typically squares, all over the item you are dying creating a grid like design. It is created by folding the fabric in an accordion style both ways into the shape you are using, in my case a square, and then using a piece of wood on each side and rubber banding or tying that down on each side to prevent the dye from dying those sections. I

Another design I wanted to try, that ended up being my least successful, was pole wrapping. In this technique the fabric is wrapped around a pole and tied with string and then scrunched down. It should create a sort of scrunched striping across your fabric. Mine didn't turn out great and I will share more of what I think went wrong in the instructions.

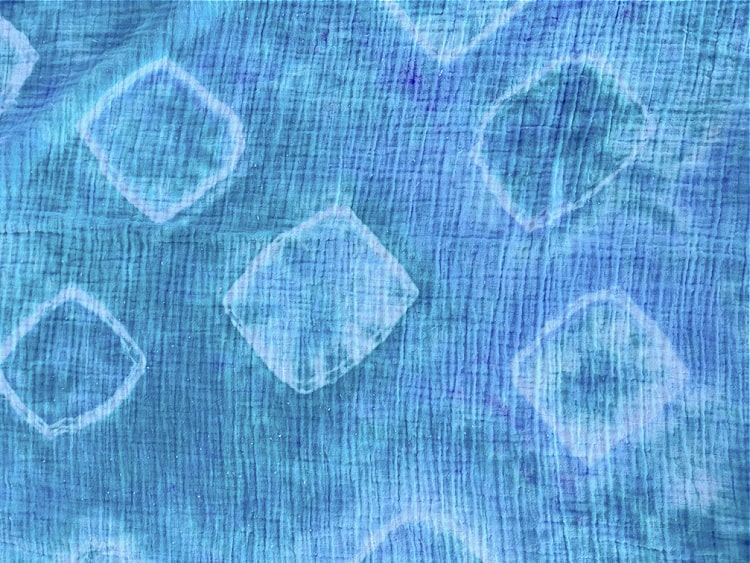
I tried a triangle fold similar to the shape resist but without the wood. And the last style I chose was rings, which is a design I have done before with tie dyed projects. This is where you just grab some small sections of fabric and rubber band or tie them off to create white rings on your fabric.
It was fun to try some new techniques. There are things I learned and would do differently next time, and things that turned out very much how I was expecting. I think one of the fun things about tie dye is that you never really know exactly how it is going to turn out until you rinse it out and wash it. You just kind of have to trust that whatever you end up with will look neat, even if it isn't exactly what you pictured when you were making it.
As always with these collaborations there is a giveaway, this time for a Tulip Tie Dye Kit with everything you need to have your own tie dye party! There are also several other fun tie dye projects so be sure to check them out.

Laura from Me and My INKlings has created a bright and colorful Rainbow Tie Dye Tote Bag
Smitha from Smiling Colors is sharing How to Throw a Tie Dye Party, perfect for Summer
Shani from Sunshine and Munchkins has created a rainbow Tie Dye Banner
Laura from Laura’s Crafty Life has a full tutorial on How to Tie Dye Tote Bags
Justine from Little Dove has created a reusable Tie Dye Fabric Wrapping Paper
Erica from 5 Little Monsters is sharing Shibori Inspired Tie Dye Swaddle Blankets
Kelsey from Poofy Cheeks has created a Tie Dye Sublimation Tumbler for Mom
How to Make Shibori Inspired Tie Dye Swaddle Blankets
You will need:
- plain white cotton swaddle blankets
- tie dye in desired colors
- rubber bands and string for binding
- 2 wooden squares for the shape resist dyeing
- a pole or pvc pice for the pole wrapping
- a plastic table cloth to cover your work surface
- gloves
- plastic wrap or ziplock bags
Instructions:
Getting Started
Design 1- Square Shape Resist (Black Blanket)

Design 2- Pole Wrap (Purple Blanket)

Design 3- Triangle Fold (Blue Blanket)

Design 4- Rings (Teal Blanket)

Finishing

No comments :
Post a Comment