
-This post may contain affiliate links-

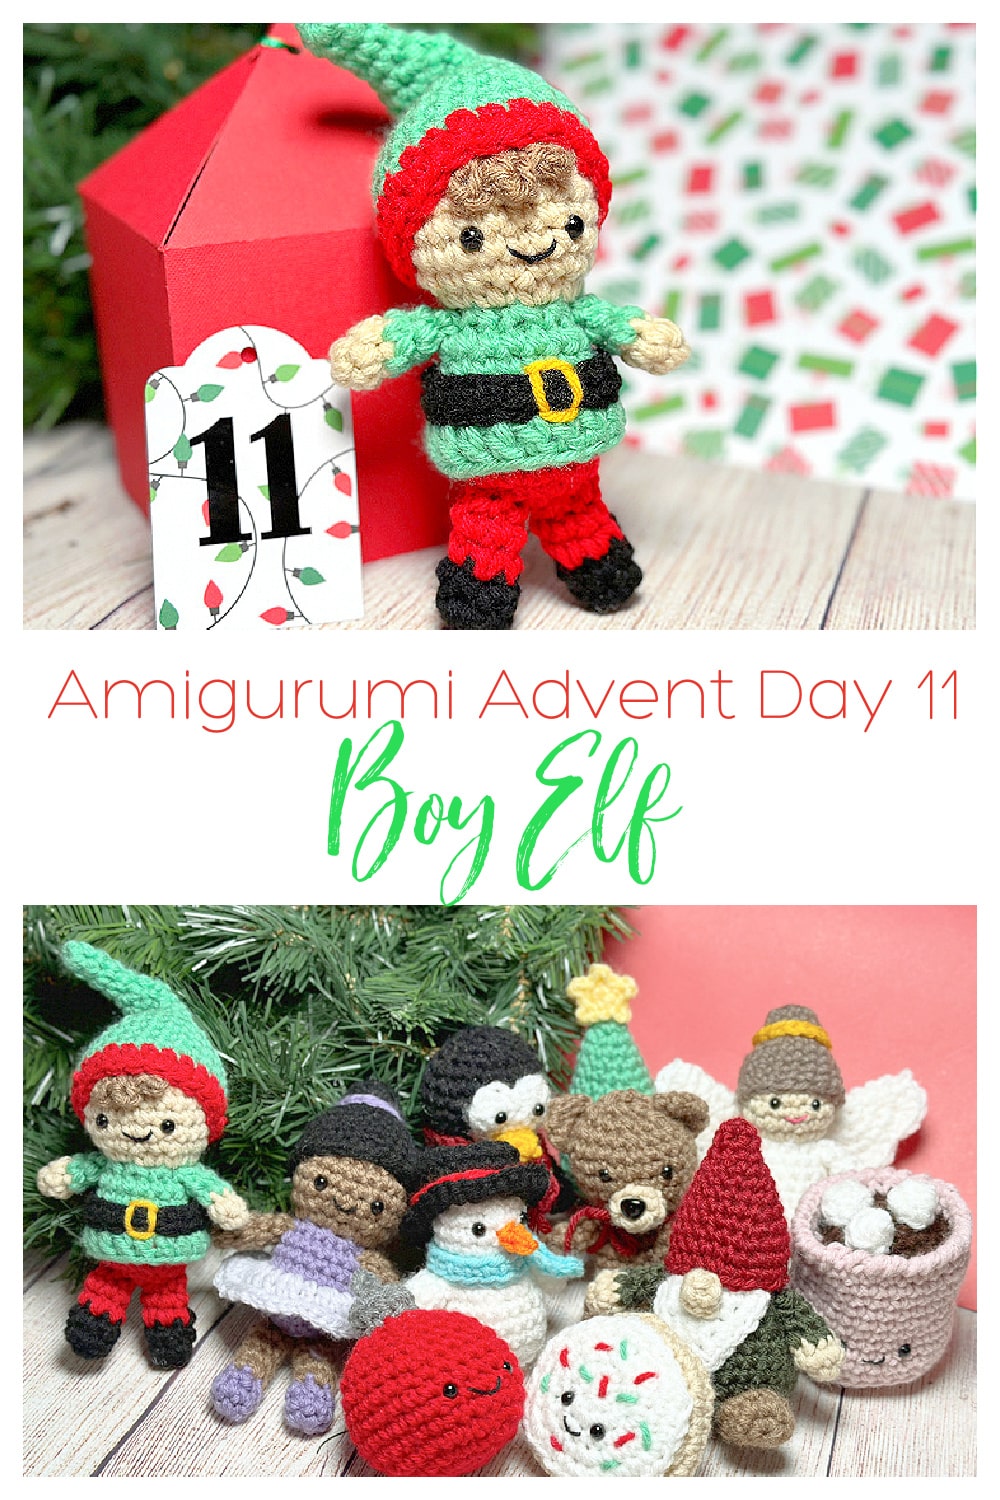
For Day 11 of the Mini Amigurumi Advent we are going to visit the North Pole, or more specifically Santa's Workshop. Today's pattern is for a little boy elf.

Dressed in festive bright red and green, this little elf is ready to make toys for Santa. He has a long pointy hat on his head with a little bit of curly hair sticking out in front.

I used safety eyes and an embroidered little mouth to make the face.

Like many of the other pieces in the series the little boy elf is made in multiple pieces that are sewn together to make the little elf figure. He is a little under 6" tall, unless you pull the hat up straight, then it is over 7".

How to Crochet a Boy Elf Amigurumi
Finished Size: about 6" tall + hat
You will need:
- medium weight yarn in skin color, hair color, red, green, black, and gold (sample made with Red Heart Super Saver in Cafe Latte, Cherry, Buff, Saffron, and Black, Loops & Threads Impeccable in Jade)
- G Crochet Hook (4.25 mm)
- 2- 6mm safety eyes
- fiberfill
- yarn needle
- black or pink embroidery floss
- embroidery needle
Instructions:
The elf body and head are made in one piece, with arms, legs, hat, belt, and hair made separately and sewn on after.
The bottom of the shirt is crocheted directly onto the body. One round on the body is worked in the back loop only, leaving the front loops open. The shirt edge will be worked into those open loops.
Body/Head
Make 1 starting with red (or color you are using for the pants) yarn, beginning with magic ring
Round 1: in mr, ch 1, 6 sc (6 sc)
Round 2: 2 sc in each st (12 sc)
Round 3: [2 sc in first st, 1 sc in next st] repeat around (18 sc)
Round 4: 1 sc in each st (18 sc)
Switch to green yarn (or color you are using for the shirt)
Round 5: 1 sc in each st (18 sc)
Round 6: 1 sc in blo of each st (this is the round the shirt edge will later be worked into) (18 sc)
Rounds 7-8: 1 sc in each st (18 sc)
Round: 9: sc2tog around (9 sc)
Switch to skin color, begin stuffing the body continuing to stuff as you work
Round 10: 2 sc in each st (18 sc)
Round 11: [2 sc in first st, 1 sc in next 2 sts] repeat around (24 sc)
Rounds 12-15: 1 sc in each st (24 sc)
Insert safety eyes between rounds 12 and 13 about 4 sts apart
Round 16: [sc2tog, 1 sc in next 2 sts] repeat around (18 sc)
Round 17: [sc2tog, 1 sc in next st] repeat around (12 sc)
Round 18: sc2tog around (6 sc)
Finish off and weave in ends
Embroider mouth with either pink or black embroidery floss
Use green (or color you are using for shirt) and attach yarn to the unworked loops of round 6 of the body. I prefer to start in the back so that the joins are less noticeable.
Join yarn to unworked loop
ch 2 (does not count as a st), 1 dc in each st. sl st to first dc to join (18 dc)
Finish off and weave in ends
Arms
Make 2 starting with skin color, begin with a magic ring
Round 1: in mr, ch 1, 6 sc (6 sc)
Round 2: 1 sc in each st (6 sc)
Switch to green (shirt color)
Round 3-4: 1 sc in each st (6 sc)
Finish off and cut yarn leaving a long tail for sewing
Sew the arms to the side of the body
Legs
Make 2 starting with black (or color you are using for shoes), beginning with magic ring
Round 1: in mr, ch 1, 6 sc (6 sc)
Round 2: [2 sc in first st, 1 sc in next st] repeat around (9 sc)
Round 3: [sc2tog, sc in next st] repeat around (6 sc)
Switch to red (or color you are using for pants)
Rounds 4-5: 1 sc in each st (6 sc)
Finish off and cut yarn leaving long tail for sewing
Sew the legs to to the bottom of the body
Belt
Make 1 with black yarn
ch 21
sc in second ch from the hook and each ch to the end
Wrap the belt around the waist and stitch in place
Use yellow/gold yarn to stitch a square around the front of the belt to make the buckle
Hair
Make 1 with hair color
ch 5
sc in second ch from the hook, [ch 2, sl st in first of the new ch (you will make a picot type stitch), sc in next ch from the original ch], repeat 2 times
Finish off and cut yarn leaving long tail for sewing
Hat
Make 1 starting with green yarn (or main hat color), begin with magic ring
Round 1: in mr, ch 1, 4 sc (4 sc)
Round 2: [2 sc in first st, 1 sc in next st], repeat around (6 sc)
Rounds 3-5: 1 sc in each st (6 sc)
Round 6: [2 sc in first st, 1 sc in next st], repeat around (9 sc)
Rounds 7-8: 1 sc in each st (9 sc)
Round 9: [2 sc in first st, 1 sc in next 2 sts], repeat around (12 sc)
Round 10: [2 sc in first st, 1 sc in next 3 sts], repeat around (15 sc)
Round 11: [2 sc in first st, 1 sc in next 4 sts], repeat around (18 sc)
Round 12: [2 sc in first st, 1 sc in next 2 sts], repeat around (24 sc)
Rounds 13-15: 1 sc in each st (24 sc)
Switch to red (or hat band color)
Rounds 16-17: 1 sc in each st (24 sc)
Finish off and cut yarn, leaving long tail for sewing
Pull hat onto head, then tuck hair just under the front edge of the hat to determine placement
Stitch the hair in place
Stitch the hat onto the head pulled over the edge of the hair
Thank you very much. I do not have time to crochet right now, but maybe I can get them done before Christmas. Thanks for all the great ideas and patterns, have a blessed weekend
ReplyDelete