
-This post may contain affiliate links.-
This week's Summer Camp Craft Saturday project is a little late. I had a super busy week ending with my 5 year old's birthday, but I figured better late than never so here we are. This week we are making bracelets again, but this time with beads. Clay disc beads to be exact.

A couple of weeks ago I was ordering the beads I used for these bracelets, and I showed my teenage daughter what I was thinking of ordering and making and she got really excited. She said they are pretty popular right now so hopefully that is true.

To be honest, all of my girls have been loving making bracelets this past week. They had some beads from jewelry kits they got for Christmas last year, and combined with the clay disc beads, and a few others I bought to combine with them, there have been lots and lots of bracelets and other jewelry over the last several days.

The clay disc beads were fun to use because they are different than any other beads I have ever used. They are super thin little discs with a hole in the middle. They have almost a rubbery feel because they are not really hard, they're a little pliable. They almost remind me of the feel of erasers or something like that.
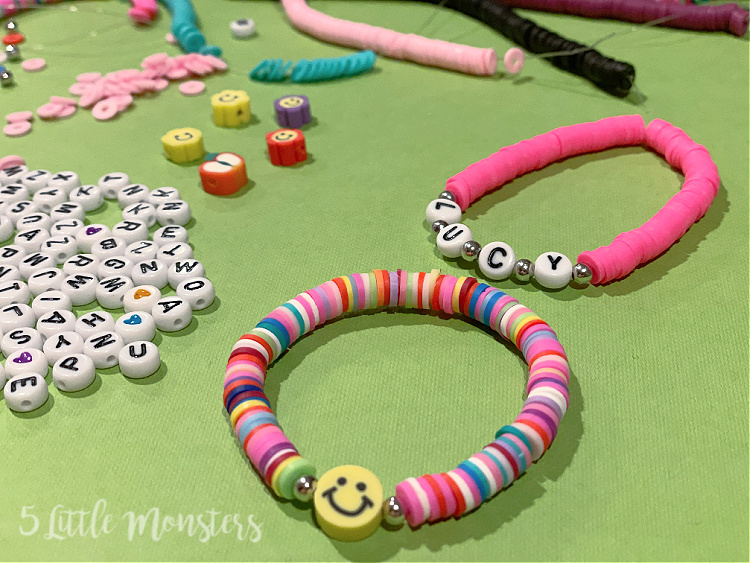
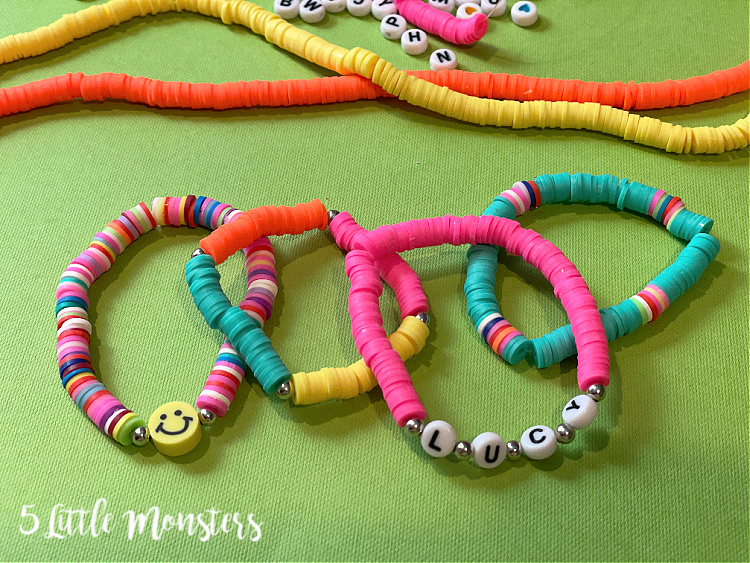
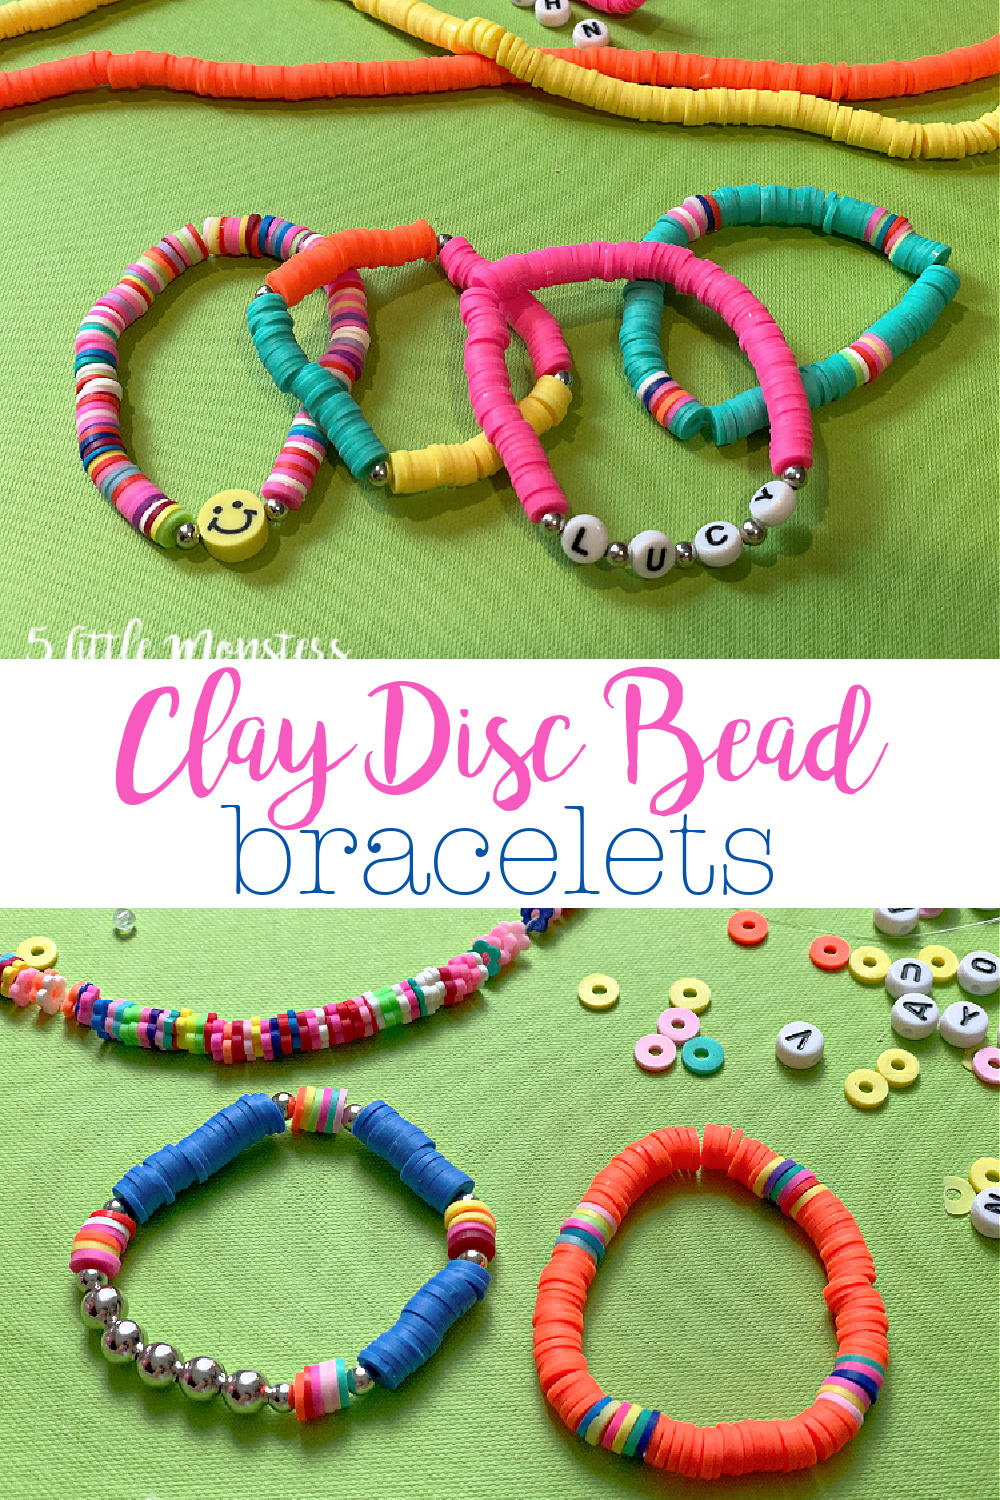
They can be stacked in solid colors, mixed up in all different colors, color blocked, and combined with other beads for lots of fun looks. In addition to the clay disc beads I also used some small round metal beads (mine were silver), letter beads, and larger clay beads that looked like smiley faces, flowers, and fruit.

These were really fun and easy to make, playing around with different color combinations, and bead combinations. It is always fun to see what everyone comes up with.

How to Make Clay Disc Bead Bracelets
You will need:
Instructions:
This is not going to be so much of a how-to tutorial, because the reality is it is just stringing beads on a string, but I will share a few simple tips, and some of the patterns that I made.
The beads I bought came on strands of different colors, 10 solid color strands, as well as one strand that was multicolored, and another that was also multicolored but rather than circles they were shaped like flowers. I didn't use the flower shaped beads in this project, but they could be used the same way.
First a couple of tips:
- Tying knots in elastic thread can be a little hard, they tend to slip really easily. To keep the knots secure put a dot of superglue on the knot and let dry. You can also squeeze the two beads on either side of the knot together so the knot is stuck between the two beads.
- The clay disc beads are really thin and it can take a while to string them all on the thread. To speed things up, especially when using sections of solid colors you can hold a stack together and push the string through several at the same time.
The options for patterns are endless, but here are a few examples that we made:
Rainbow Smiley Face: We used a random, colorful assortment of clay beads (I used the multicolor strand to make this one), and then halfway through I added a silver bead, then a smiley face, another silver bead, and then repeated the random rainbow assortment on the other side.
Name Bracelet: This one was made very similar to the rainbow smiley face bracelet, but instead of a rainbow beads I just did one solid color all the way around. I did just under half the bracelet in solid colors, followed by alternating a metal bead and a letter to spell out the name. Then I added the rest of the solid color beads on the other side.
Color Block: Start with a stack of one solid color, add a metal bead, then a similar sized stack of another color. Repeat this until you have the length that you need.
Rainbow Stripes: Start with a solid color stack, similar to the color block bracelet, then add a few rainbow beads (I added 6 in random colors), then add more of the solid color (same color as the first stack), and repeat the rainbow beads, then solid color, until you have the length you need.
Metal Bead Accent: For this last one I made a bracelet similar to the rainbow stripes bracelet above, but I added metal beads in between the solid sections and the rainbow sections, then in the center I added several metal beads in a row.
These are obviously just a few ideas for bracelets you can make. You can follow these ideas, mix and match them, or come up with something completely different!
No comments :
Post a Comment