
-Products for this post provided by Cricut. This post may contain affiliate links.-


The biggest downside in my opinion is that you have to use the Cricut blanks that are infusible ink compatible. They have shirts, baby bodysuits, tote bags, and coasters. I understand why this is the case but it seems like it will be very limiting and a little pricey. Because of the way the infusible ink works I think it would be hard to guarantee results on other things since items are made of so many different fabric blends with lots of coatings and treatments on the fabric and it would be impossible for them to guarantee. Also, my understanding is that the Cricut blanks are treated in some way that helps the ink transfer.
You press it at a high heat and it transfers the color into the fibers of the fabric or surface that you are pressing it onto. The transfer sheets feel like a thick paper with a plastic transfer sheet. You can see the color on the paper side but it is a lot less vibrant than the actual color will turn out. You put the plastic transfer side down, paper side up on your mat.

You need to mirror your image just like you normally do when using iron on, then cut and weed. You will layer the surface and design, along with cardstock and butcher paper, then press at a high heat. Let it cool and remove the layers.
It was a really easy process once I read through the instructions. I can't wait to play around with some of the other products. I think the markers will be really neat and I'm excited to try out the coasters since that is a different material than I normally press images onto. There are a lot of really cool patterned transfer sheets that I can't wait to try too.

How to Make an Infusible Ink Library Bag
You will need:
- Cricut Maker or Explore
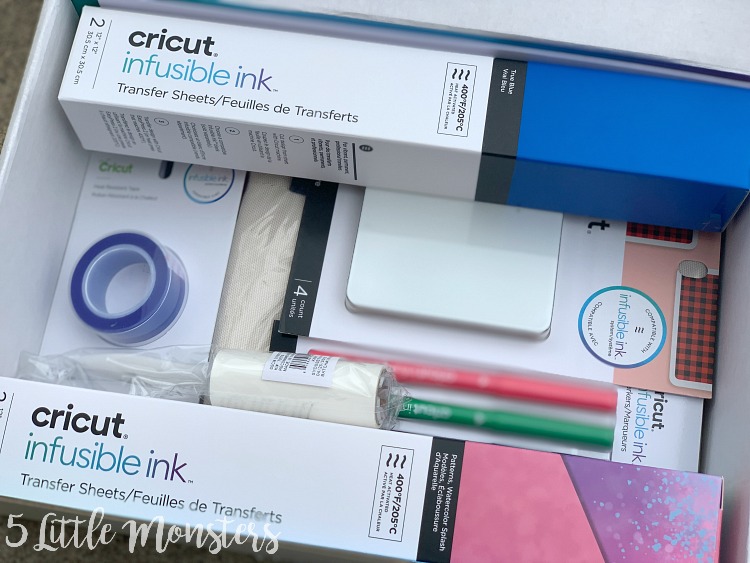
- Infusible Ink Transfer Sheet
- Infusible Ink Compatible Tote Bag
- EasyPress 2
- EasyPress Mat
- White Cardstock
- Butcher Paper (included in the roll of Infusible Ink Transfer Sheets)
- Lint Roller
Instructions:
Prepare your design in Design Space, I used this Just One More Story design available through Cricut Access.
Cut your design the same way you would cut iron on, transfer sheet side down on the mat, image mirrored. Use the Infusible Ink Transfer Sheet material setting.
Carefully weed you design. I found that the material is pretty stiff so if you just sort of roll the edges it will pop up pretty easily so you can weed.
Now you are ready to press and the process has a few more steps than pressing iron on. You can find all of the instructions for using sheets or pens on different surfaces in this heat guide.
For the tote bag and transfer sheet you will heat your EasyPress to 385 degrees and set the timer to 40 seconds.
Now you will layer as follows: first, EasyPress Mat, next slide a sheet of white cardstock inside of the tote bag and place that on the mat, next use a lint roller to remove lint from the tote bag.
Cover the tote bag with the butcher paper and press for 15 seconds to preheat the bag. Remove the butcher paper.
Place the prepared image colored side down on the tote bag, cover with butcher paper.
Press for 40 seconds.
Carefully remove butcher paper and let cool. Then remove the design from the bag. There will still be paper on the transfer sheet but the ink will have transferred onto the bag.

No comments :
Post a Comment