
-This post may contain affiliate links-
The past month or so life has just seemed super crazy and busy. I think that is the case in May for everyone who has kids in school, with all of the end of the year activities, field trips, concerts, assemblies, performances, not to mention the testing that has kids extra stressed out and on edge. I feel like everything has seemed extra chaotic and crazy and it has made me realize how much I needed to get myself better organized before all of the kids were home for summer.

One area that has been a huge struggle for me lately is dinner. With kids involved in after school activities, especially teenagers, evenings in our house can get a little busy. I feel like I have had times in my life that I have been really good about meal planning, grocery shopping, and dinner time, but lately dinner time has been one of the most chaotic times of all.
I felt like I was finding myself scrambling to figure out something quick for dinner almost every night. Meals were not well thought out, they were pretty much whatever I could come up with to throw together fast. Not to mention the fact that we were in a rut of eating the same meals over and over and I was tired of all of them. And because I was doing a terrible job of meal planning I felt like I was running to the store constantly and spending way more money than I should on groceries. I realized that this was adding a lot of stress for me and I needed to make a change. 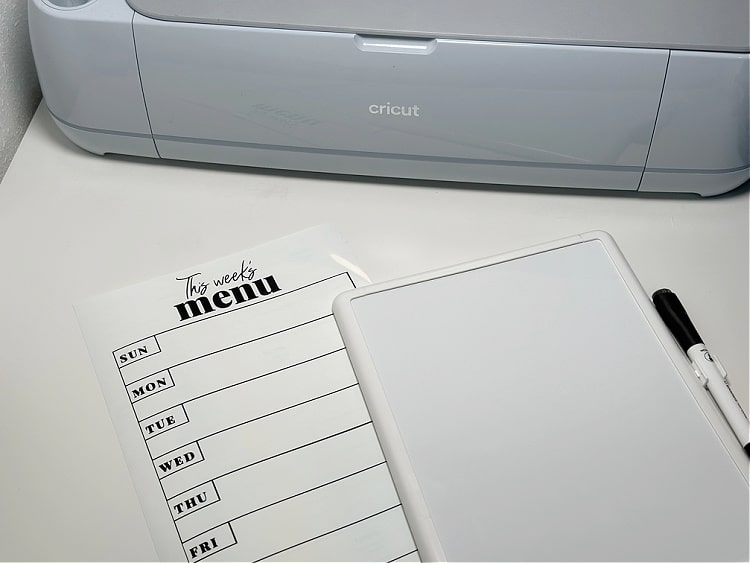
I started putting together a meal plan again, throwing in some meals we eat regularly that I knew my kids liked, but also adding some new recipes to the mix to keep me from getting bored. I got back in the habit of doing a big grocery shopping trip so I could have everything I needed, which saved me both time and money in extra trips to the store. It seems like such a simple basic thing, and it is something I have done really well in the past, but getting back on track with it the last few weeks has made a huge difference for me.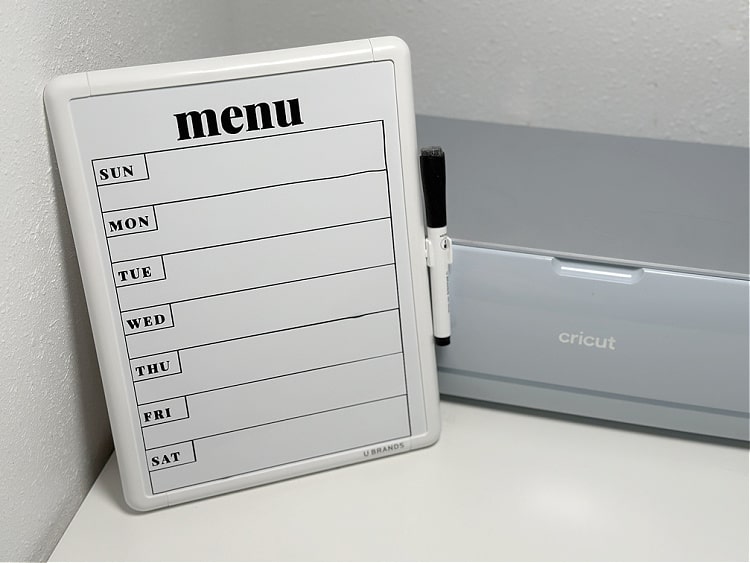
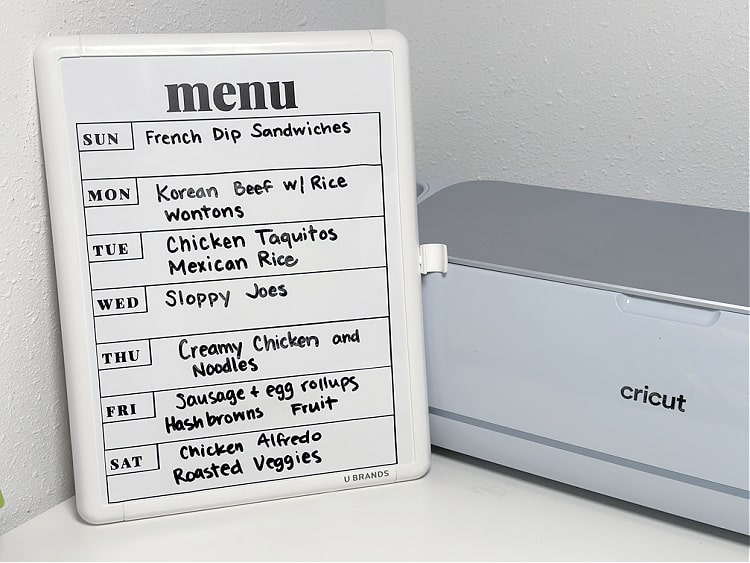
The only thing that was still making me a little crazy was the amount of times each day I was asked what was for dinner, so I decided that instead of just scribbling my meal plan in a notebook or typing it up in a not on my phone where only I would see it, we needed a menu board. That way everyone could know everyday what the plan was and they wouldn't have to ask. In fact since we started using it it has been funny because when one of the kids asks what's for dinner, I often hear one of the other kids say, "Look at the white board" before I even have a chance to respond. Or sometimes they will even stop themselves mid question and say they will just go check the board.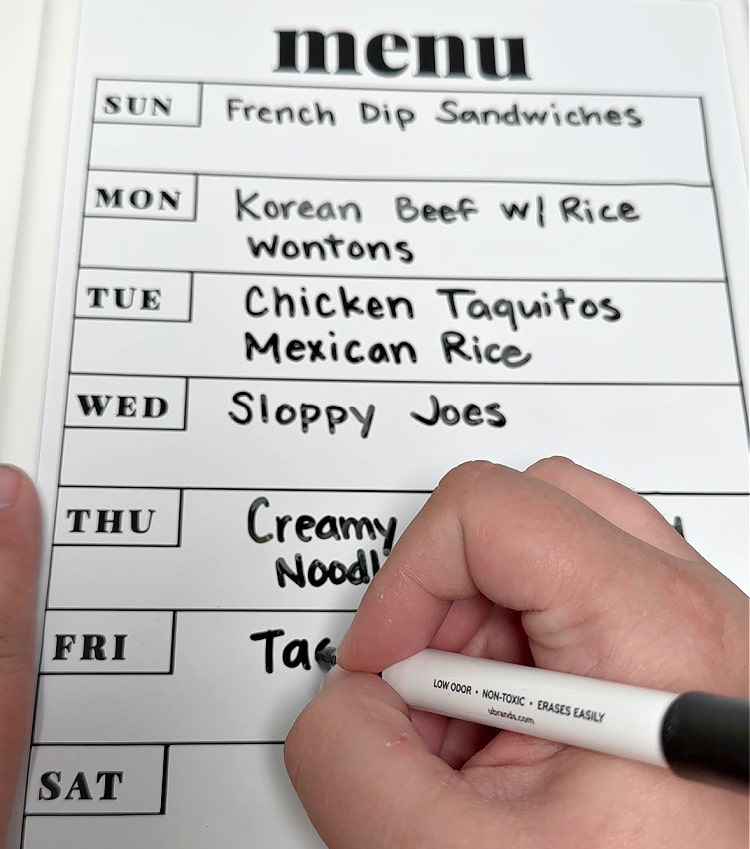
I thought about trying to make something fancy and more complicated and aesthetically pleasing, but then I decided I would rather go for inexpensive, practical, and easy instead. This menu board is super simple and basic, but it has worked well for us so I thought it was worth sharing. Maybe there is someone else out there that could use a super quick and easy menu board to help them stay organized too.


I started putting together a meal plan again, throwing in some meals we eat regularly that I knew my kids liked, but also adding some new recipes to the mix to keep me from getting bored. I got back in the habit of doing a big grocery shopping trip so I could have everything I needed, which saved me both time and money in extra trips to the store. It seems like such a simple basic thing, and it is something I have done really well in the past, but getting back on track with it the last few weeks has made a huge difference for me.

The only thing that was still making me a little crazy was the amount of times each day I was asked what was for dinner, so I decided that instead of just scribbling my meal plan in a notebook or typing it up in a not on my phone where only I would see it, we needed a menu board. That way everyone could know everyday what the plan was and they wouldn't have to ask. In fact since we started using it it has been funny because when one of the kids asks what's for dinner, I often hear one of the other kids say, "Look at the white board" before I even have a chance to respond. Or sometimes they will even stop themselves mid question and say they will just go check the board.

I thought about trying to make something fancy and more complicated and aesthetically pleasing, but then I decided I would rather go for inexpensive, practical, and easy instead. This menu board is super simple and basic, but it has worked well for us so I thought it was worth sharing. Maybe there is someone else out there that could use a super quick and easy menu board to help them stay organized too.

How to Make an Easy Dry Erase Menu Board
You will need:
- Cricut Machine (I used my Cricut Maker 3)
- Black Permanent Vinyl (I used Cricut Smart Vinyl)
- Transfer Tape
- Dry Erase Board (the one I used was 8.5"x11")
Instructions:
There are several Menu board designs already available in Design Space, most free if you have Cricut Access, or most are around $1.99 if you want to purchase the design by itself without a subscription. One of the things that I like to do is find a design that I like, and then use the tools available in Design Space to edit it and make it what I want.
The design I chose was one already available in Design Space, but it was a little too skinny for the board I was using, and it had some stars that I didn't want to include. I adjusted the design to make it wider and got rid of the stars. You can see my edited Menu Board Design Space Project if you want to use the same design I did.
I used the contour tool to remove the stars that I didn't want. The slice tool is also great for moving things around. I used it to move the words closer to the chart, and also to slice the end off of the chart and stretch it out to make a wider design. The attach tool helps you keep everything right where you want it. Align is a tool I use all the time to make sure everything is lined up and centered.
Once you have you design chosen and ready to go you can resize it as needed to fit your board. Make sure to measure the actual whiteboard part of the board, not just use the dimensions on the tag. You may notice in the pictures or the Design Space project that there were the words "This Week's" that didn't end up on the final board. I went off the measurements on the tag without checking to see if the measurements included the frame, and when I went to stick my vinyl on it was a little too big. I turned out the dimensions on the tag were the outside dimensions, not the white board dimensions. I decided just to take those words off and leave it rather than cutting it out again, but they were cute so I wish I would have been better about measuring and double checking the size. I like to make a rectangle that is the size of my board so that I can then resize to fit exactly the way I want and make sure I like it before I cut.
Cut the design out of vinyl. I used smart vinyl, which made it super easy because I didn't even need a mat, but any permanent vinyl will work great. Make sure you select the appropriate settings for the vinyl you are using.
Weed your design.
Use transfer tape to transfer the design onto the white board, burnish, and remove the transfer tape.
Then all that is left is to fill out the meals you are making this week!

No comments :
Post a Comment