
-This post may contain affiliate links-

As I am sure anyone who has been following me for any length of time already knows, I love fall, I love pumpkins, and I love playing with the textures of crochet stitches. Put all of those together and one of my favorite things to crochet in the fall is pumpkins. I have lots of patterns already on my website, some using very basic stitches, and others that use stitches that create really interesting textures. And I am always thinking of new stitches that I think would be fun to try on a pumpkin.

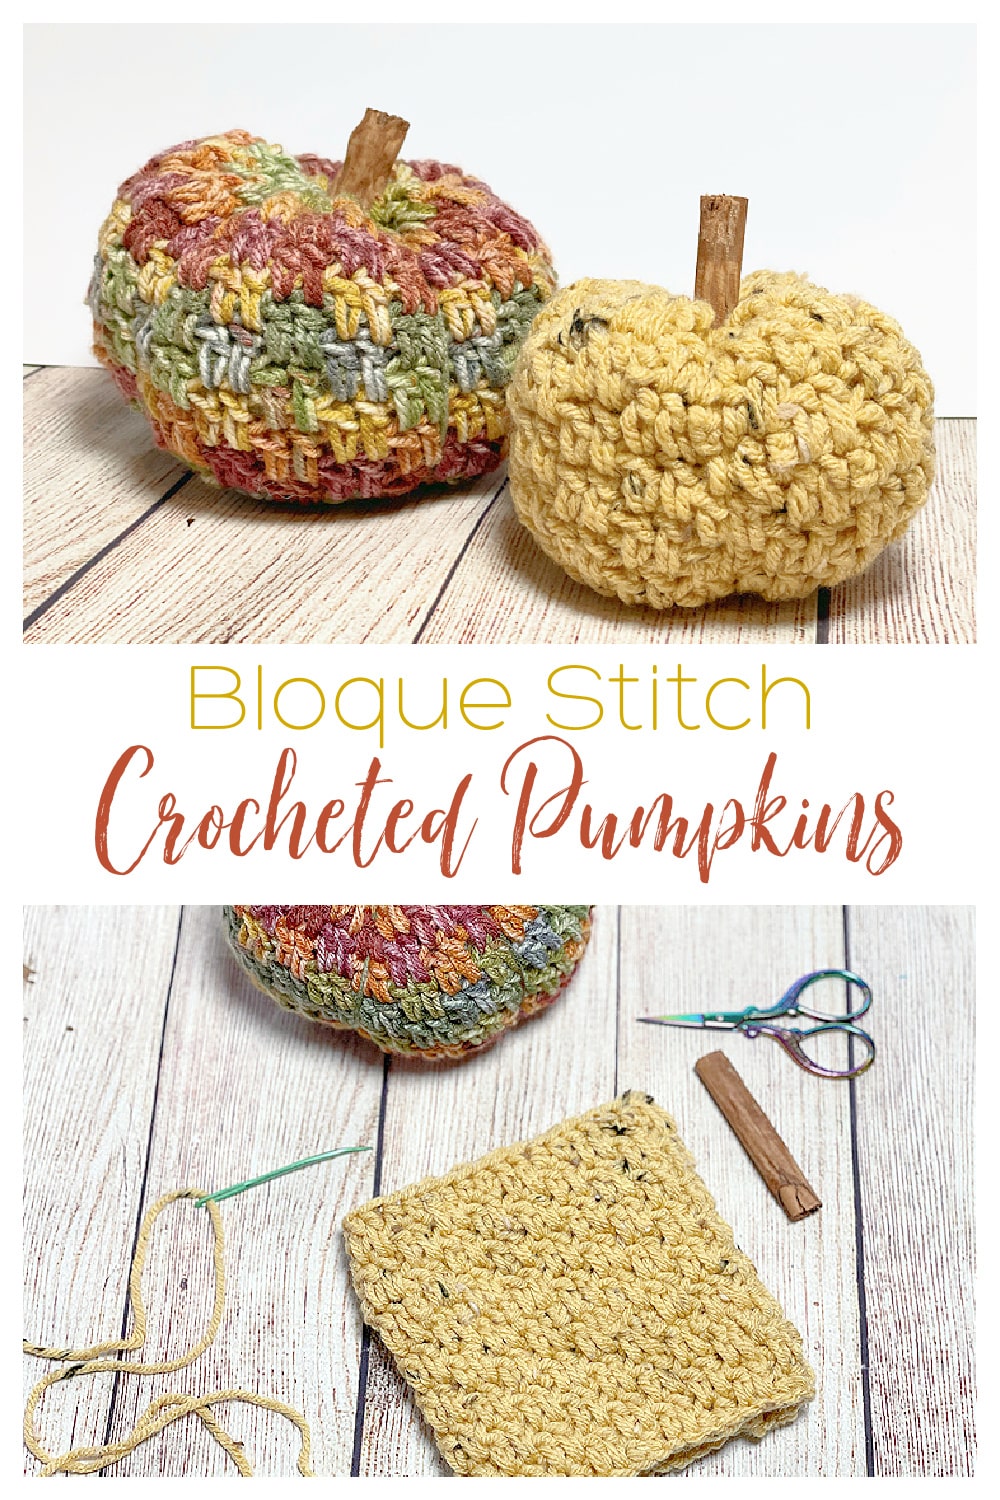
This pattern is one of those. It uses a stitch that I learned as the bloque stitch. I have used it to make a baby blanket as well as in a dishcloth pattern I even have a video showing how to make this stitch. It has kind of a woven look to it, because you are working some of the stitches into a row a couple of rows below. This creates a sort of interlocking effect.

One thing that I think is kind of fun about this stitch is that it works really well with multicolor yarn, maybe not so much the variegated yarn that has super short color changes, but yarn that changes colors about each row gives kind of a cool effect and makes that interlocking/woven texture of the stitch really stand out.

I have been wanting to make a set of pumpkins with this stitch for a while, but I thought it would be kind of fun to use a yarn that had some color change in it. I started looking for a fall-ish colored variegated yarn, with sort of long but not too long color changes, and I had a hard time finding what I was picturing in my mind. There are fall colored yarn that have super long color changes like the Mandala yarn I used for my fall forest wrap, but those are too long for a small project like this. Then I happened to be scrolling through Instagram and I saw a picture of something someone had made with a color way of Hobby Lobby's I Love this Yarn, and I felt like it was exactly what I wanted.

I rarely go to Hobby Lobby because although there is one that is not terribly far from my house, it is not in a direction I often go to run errands so it feels out of the way. But I made a special trip for some fall colored yarn and I found exactly what I was looking for. The color way I got was called Cinnamon Cedar, and I also picked up a yellow tweed yarn to coordinate with it.

I love the texture of the stitch in both the striped and solid yarn, but I think the striped yarn just brings out the stitch in a fun way. Either way, whatever color you choose to use, this is another fun textured pumpkin to make.

How to Crochet
You will need:
- Worsted Weight Yarn (I used I Love This Yarn in Cinnamon Cedar and Dijon Sweed)
- H Crochet Hook (5 mm)
- Stuffing
- Yarn Needle
- Cinnamon Stitch, Small Stick, or Short Dowel
Instructions:
To change the size of the pumpkins you will need to adjust the number of stitches per round as well as the number of rounds you work.
- Begin with a multiple of 4 stitches (samples have 48 and 36 stitches per round)
- Work as many rounds as you want to get the height of the pumpkin, but keep in mind the fact that you will cinch in both the top and the bottom so the tube will look a lot taller than the finished pumpkin, when you finish the second to last row you will then work the final round following the instructions (samples made with 17 and 15 rounds)
In this pattern the beginning ch 2 does not count as a stitch, you will sl st over to the first ch sp on each round to begin.
I have a video showing how to work the bloque stitch, it is slightly different because it is worked flat, and the pumpkins are worked in the round, but it should help give the idea of how to make the stitch.
Larger Pumpkin
(made with I Love this Yarn in Cinnamon Cedar)
Ch 48, join to first ch to make a large ring
Round 1: ch 2 (does not count as a stitch), [1 hdc in first 2 sts, ch 2, sk next 2 sts] repeat around, sl st to first hdc to join (24 hdc, 24 ch)
Round 2: sl st in the top of the next hdc and into first ch sp, ch 2, [dc in the 2 skipped ch from the foundation ch (working over the ch from round 1), ch 2, skip next 2 stitches] repeat around. sl st to first dc to join (24 dc, 24 ch)
Round 3: sl st in the top of the next hdc and into first ch sp, ch 2, [dc in the 2 skipped sts from 2 rounds below (working over the ch from previous round), ch 2, skip next 2 stitches] repeat around. sl st to first dc to join (24 dc, 24 ch)
Round 4-16: repeat round 3
Round 17: ch 2, [hdc in first 2 sts, dc in the 2 skipped sts from 2 rounds below] repeat around. sl st to first hdc to join (24 dc, 24 hdc)
Finish off and cut yarn, leaving a long tail
Cut a separate long length of yarn and use yarn needle to weave around the bottom edge, pull to cinch the bottom closed, knot ends and pull to inside of the pumpkin
Add stuffing
Use the tail to weave around the top edge and pull to cinch closed, before it is fully closed insert the cinnamon stick, or other stick, you are using for a stem, then pull tight around the stick, stitch in place to secure well, weave in a cut yarn
You can be finished with the pumpkin at this point, some of my crocheted pumpkins I stop here, but to create more of the bumpy shape of a pumpkins continue on to the next step.
Cut another long piece of yarn and thread on yarn needle, insert the needle from the bottom center and push through to the center of the top, then wrap the yarn around the side of the pumpkin back down to the bottom, repeat the process as many times as you want all around the pumpkin (I usually do about 5 wraps) pulling the yarn tight enough that it pulls the side of the pumpkin in slightly
Smaller Pumpkin
(made with I Love this Yarn in Sweed Dijon)
Ch 36, join to first ch to make a large ring
Round 1: ch 2 (does not count as a stitch), [1 hdc in first 2 sts, ch 2, sk next 2 sts] repeat around, sl st to first hdc to join (18 hdc, 18 ch)
Round 2: sl st in the top of the next hdc and into first ch sp, ch 2, [dc in the 2 skipped ch from the foundation ch (working over the ch from round 1), ch 2, skip next 2 stitches] repeat around. sl st to first dc to join (18 dc, 18 ch)
Round 3: sl st in the top of the next hdc and into first ch sp, ch 2, [dc in the 2 skipped sts from 2 rounds below (working over the ch from previous round), ch 2, skip next 2 stitches] repeat around. sl st to first dc to join (18 dc, 18 ch)
Round 4-14: repeat round 3
Round 15: ch 2, [hdc in first 2 sts, dc in the 2 skipped sts from 2 rounds below] repeat around. sl st to first hdc to join (18 dc, 18 hdc)
Finish off and cut yarn, leaving a long tail
Cut a separate long length of yarn and use yarn needle to weave around the bottom edge, pull to cinch the bottom closed, knot ends and pull to inside of the pumpkin
Add stuffing
Use the tail to weave around the top edge and pull to cinch closed, before it is fully closed insert the cinnamon stick, or other stick, you are using for a stem, then pull tight around the stick, stitch in place to secure well, weave in a cut yarn
You can be finished with the pumpkin at this point, some of my crocheted pumpkins I stop here, but to create more of the bumpy shape of a pumpkins continue on to the next step.
Cut another long piece of yarn and thread on yarn needle, insert the needle from the bottom center and push through to the center of the top, then wrap the yarn around the side of the pumpkin back down to the bottom, repeat the process as many times as you want all around the pumpkin (I usually do about 5 wraps) pulling the yarn tight enough that it pulls the side of the pumpkin in slightly
No comments :
Post a Comment