
-This post may contain affiliate links-
This week has been a crazy one in our house, as we adjust to new schools, new schedules, and getting back into the routine of the school year. All 6 of my kids are in school this year, the older kids started at the beginning of the week, and my youngest had his first day of kindergarten today.

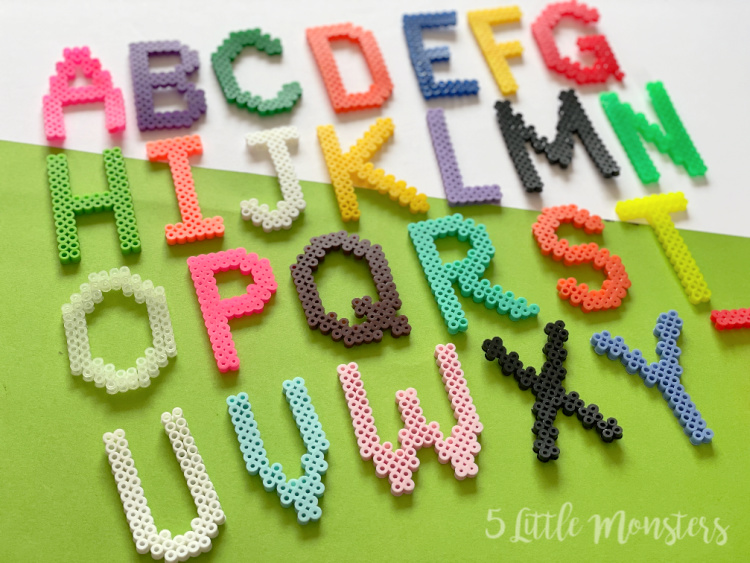
Having a kindergartner this year we have, and will continue to, spend a lot of time working on learning letters and words. During the summer I got the idea to make a set of letters out of Perler Beads. I thought they would be a fun way for him to practice letters, and learn simple words. Letters that he could hold, and play with, and move around. My thought was that it would be similar to the little magnetic letters that you can get.

The project kept getting pushed back because I had other things I was working on, but with back to school stuff on my mind the last couple of weeks I finally sat down to make them.

All of the letters are made on a 14x14 pegboard, so each one is 14 beads tall and less than 14 wide (the width varies by letter). I only made one of each for this set, but you could definitely make multiples of commonly used letters to practice spelling words, or for names.

How to Make Perler Bead Alphabet
You will need:
- Alphabet Perler Bead Designs
- Perler Beads in a variety of colors
- square pegboard (14x14 or larger)
- ironing paper
- iron (I love my Cricut EasyPress Mini for Perler Bead projects)
Instructions:
Place the beads on the pegboard following the graphs. I used one color for each letter.
Lay ironing paper over the pegboard with beads in place.
Iron carefully over the top until the beads are fused together.
Pull the fused design off of the pegboard and flip over, place the ironing paper on top and lightly press the other side of the design.

No comments :
Post a Comment