
-This post may contain affiliate links-

I always have so many plans for December crafts, but then life gets so busy this time of year that I never seem to get all of it done. This has been a problem my whole life. I used to make a lot more handmade gifts than I do now, and never seemed to get all of them done before Christmas. I remember as a teenager deciding I was going to make a patchwork quilt for my mom. I stayed up late working on it but when Christmas morning came all I had to show her was a pile of strips of squares that I had sewn together. And that is definitely not the only time that has happened to me.
This year seems to be no different, I had lots of plans for Christmas projects that I wanted to share, but have not even come close to getting them all done, let alone tutorials written. Somehow here we are the week of Christmas and I have hardly shared any projects this whole month. And now I feel like I am out of time. I still have a couple super simple Christmas projects to share this week, things that can be made last minute for little gifts or decorations.

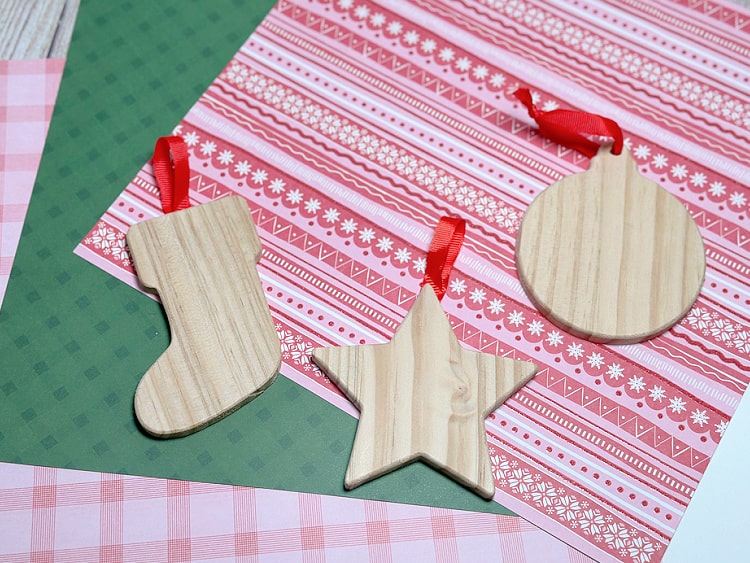
For the first quick project I want to share I made some super simple Christmas ornaments. All you need to make these ornaments is some unfinished wooden ornaments or shapes, scrapbook paper in Christmas prints or colors, and some Mod Podge. I also used a little bit of glittery paint on a couple of them but that is completely optional.

By using the scrapbook paper you get ornaments with cute prints with very little effort. I picked up all of the supplies I used for my project at Micheals, but you can find wooden shapes and cute paper at any craft store. They are super quick and easy to make, the hardest part is waiting for them to dry, and pretty inexpensive to make too.
How to Make Wood and Paper Mod Podge Christmas Ornaments
You will need:
- Unfinished Wood Ornaments or Cutout Shapes
- Scrapbook Paper in a Variety of Christmas Prints
- Mod Podge
- Paintbrush
- Sandpaper
- Optional: Glitter Paint or Glitter Mod Podge
Instructions:
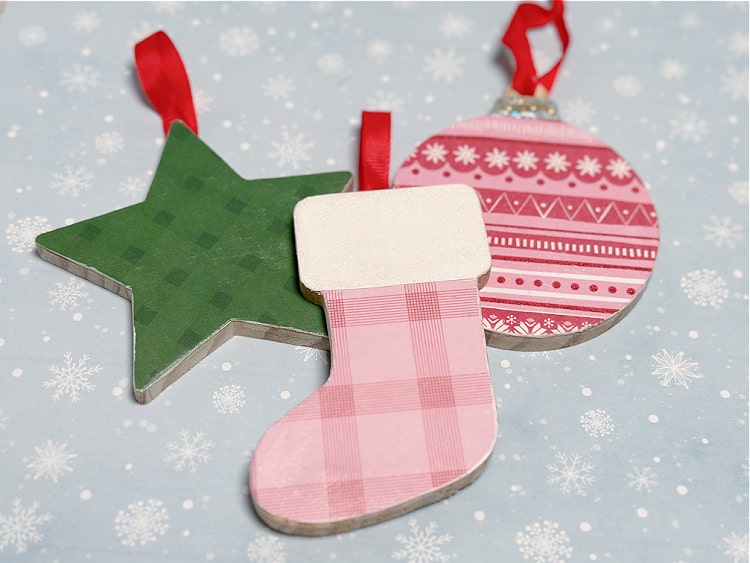
Begin by tracing the outline of your wooden shape on the scrapbook paper. I prefer to do this with the wood right side down on the back side of the paper to avoid having any lines show.
Cut out the traced shape.
Use Mod Podge to glue the paper cutout to the front of the wooden shape.
Use Sandpaper to remove any excess paper that may hang over the edge of the shape, so that the paper is smooth around the wood shape. (I didn't have any sandpaper so I used a nail file, which gives the same effect)
Put a layer of Mod Podge over the top of the paper to seal. Let dry.
You can be finished at this point, or you can add some glitter paint to the top of some pieces. I left the Star as it was after the Mod Podge layer. For the Stocking I added a coat of FolkArt Extreme Glitter in Hologram on the cuff (which was just plain white paper). For the Ornament I used a little bit of FolkArt Glitterific in Silver on the little ornament topper (which was plain gray).
Add ribbons or hangers if needed, the ornament I used already had hanging ribbons.

No comments :
Post a Comment