
-This post may contain affiliate links-

Iron on is probably my favorite material to use with my Cricut. Most of the time I use it to make things like shirts, bags, and other fabric items. But, you can actually use iron on on a lot of different types of surfaces besides fabric, like wood, paper, cardstock, cork, and more.

I love the way that iron on, or heat transfer vinyl, adheres to surfaces, I find it easier to weed than adhesive vinyl, plus it is already on the transfer sheet, no transfer tape needed.

I had some little blank journals that had paper covers and I wanted to add some vinyl to the front of them, just to make them a little cuter and more fun. I thought about adhesive vinyl but I was a little nervous that the type of transfer tape I have right now might stick to the paper covers and tear them. As I thought about it I realized that iron on would be so much easier for this project.

I kind of had some ideas going into it what I wanted them to say or have on them, so I got onto Design Space and found some images that I liked, add some text to a couple of others, and made my designs.

I love using little notebooks to jot down ideas, doodles, and make lists of tasks I need to do or goals I want to accomplish. A blank notebook and some colorful pens are a few of my favorite things.
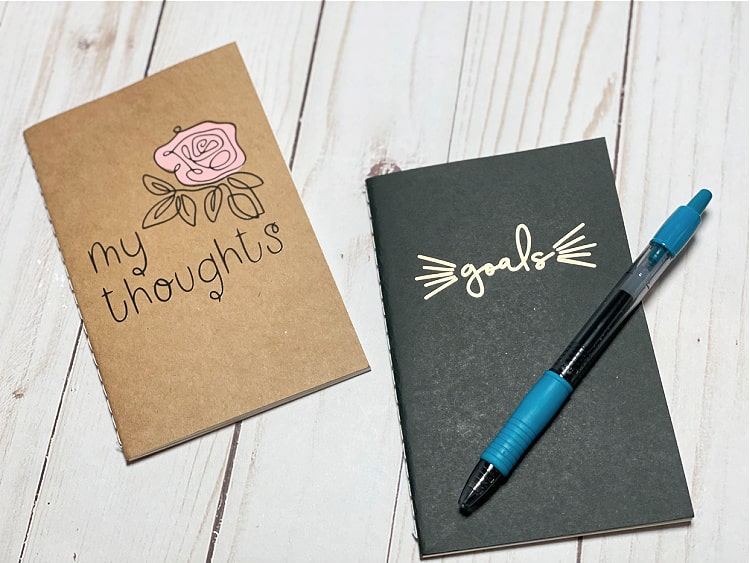
Because I knew that is how I like to use notebooks I kind of went with an ideas/dreams/goals theme for the designs. The "goals" and "make your dreams happen" were images available in Design Space (free with Cricut Access) that I used exactly as is. The other two, "my thoughts" and "bright ideas" were a combination of Design Space images and text that I added (images and fonts also free with Cricut Access).

How to Make Notebooks with Iron On Designs
You will need:
- Cricut (I used my Maker 3)
- Everyday Iron On in desired colors
- paper cover notebooks (I used 2 sizes 8.5"x 5.5" and 5.5"x 3.5")
- Mini EasyPress
Instructions:
The first step is to find or create the designs that you want to use on your notebook.
You can find the designs I used on my notebooks here: Iron On Notebook Covers Design Space File
Or you can make your own. I searched things like "dream" "goal" "ideas" as well as the types of images I wanted to use like "light bulb".
Once I found a couple of designs that I liked, as well as a couple of elements that I wanted, I added some text to complete the designs.
When you have your designs ready you will need to resize them to fit your notebook. I find the easiest way to do this and make sure you will be happy with the size is to first, make a rectangle the size of your notebook. Then I even like to change the color to be the color of the thing I will be putting it on because it helps me visualize it, but this is not necessary. In fact now you can change shapes to guide using the operation drop down box and it will not cut. But, I just make a rectangle the size and color I need it, then resize the design to fit the way you want it on that rectangle. Then before you cut just hide the rectangle by clicking the little eye on the layers panel.
Next you will cut out your designs. Because you are using iron on you need to remember to mirror the design.
I was cutting 4 different colors but since they were all small pieces I just moved all of the images to one mat and placed one color design in each corner. Then I put small scraps of iron on of each color in the corresponding color. This allowed me to cut all of the pieces at once without having to load the mat 4 times.
Weed the designs.
Press each design onto the book covers using low heat and a quick press (you can follow the heat guide instructions for pressing on cardstock). It doesn't take long at all for the adhesive to adhere to the paper covers. Be careful not to press too long or the heat might cause the covers to warp a little. Peel off the transfer sheet and layer any other colors if needed.

No comments :
Post a Comment