
-This post may contain affiliate links-
*Purchase an ad-free version of this pattern on Etsy or Ravelry
Today I am joining up with Team Creative Crafts and a bunch of other craft bloggers for another crafty collaboration. The theme this month- Pumpkins!
I love fall and pumpkins and all of the other fall decor, so I was excited for this theme. One of my favorite pumpkin crafts to make is crocheted pumpkins. If you have been following me for a while you probably know that I have lots of crocheted pumpkin patterns on my blog. I usually seem to get one or two more up each year. I love playing with the textures of different stitches to make them.

This time I decided that instead of changing up the stitches to make different pumpkins I was going to change up the yarn. One of the easiest pumpkin patterns I have is my Easy Ribbed Crocheted Pumpkin. It is super easy to make because it is just a rectangle made up of stitches worked in the back loop, to give it the ribbed texture. Then you stitch the ends together to make a tube, cinch up the top and bottom, and you have a pumpkin. It really is super simple.
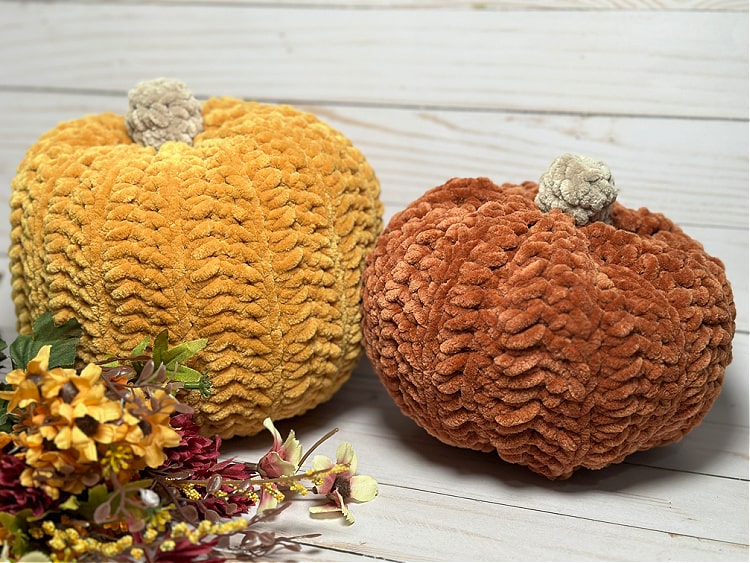
For this project I decided to take that idea, but instead of using regular worsted weight acrylic like I did for the original pattern I used a super bulky chenille type yarn, It make a bigger pumpkin with a soft, velvety texture that was a fun contrast to the other pumpkins I have made.

One of the biggest changes I made between this and the original pattern that I based it on is that I crocheted a stem. Normally I just use a small stick or a cinnamon stick and poke it in the top to make the stem, but since this pumpkin was a little bigger I felt like a cinnamon stick was going to way to tiny for the stem.
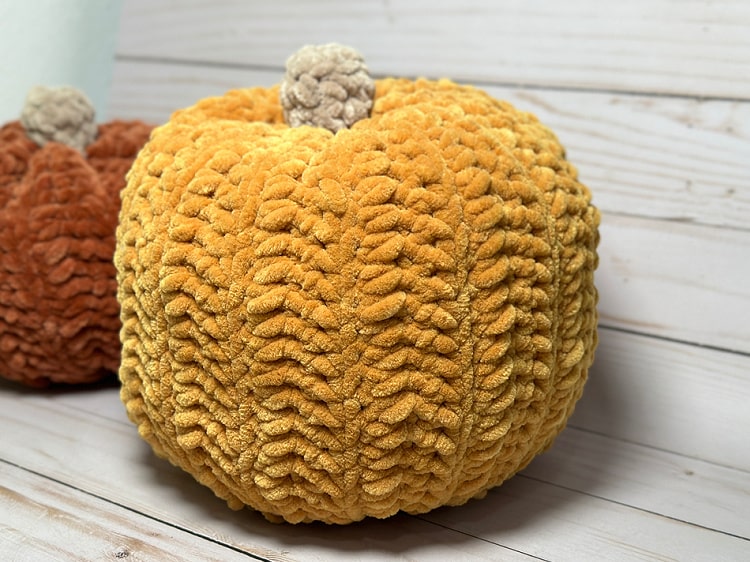
It is very easy to adjust this pumpkin to be larger or smaller by simply changing the number of chains in your starting chain, and the number of rows you work. I made 2 sizes, the smaller one (orange) following the original pattern, and the larger (yellow) by starting with a slightly longer chain and adding a few more rows.

Get the Plush Pumpkin pattern below, and be sure to check out all of the other fun pumpkin projects being shared today to get you ready for fall!

Stained Wooden Board Pumpkin Décor from Laura at Me and My INKlings
15 Minute Dollar Tree Bandana Pumpkins from Beth at Creatively Beth
Stacked Pumpkin Polymer Clay Earrings from Lindsay at Artsy Fartsy Mama
Dollar Tree Mini Pumpkin Wreath from Laura at Laura’s Crafty Life
How to Make a Pumpkin Wreath from Smitha at Smiling Colors
Free Printable Pumpkin Word Search from Shani at Sunshine and Munchkins
Camping Inspired Jack-O-Lantern Templates from Justine at Little Dove
No Sew Pumpkin Pillows from Debra at Debra Quartermain Design
Finger Knitted Pumpkin Décor from Jane at DIY by Jane

*Purchase an ad-free version of this pattern on Etsy or Ravelry
How to Crochet Plush Pumpkins
You will need:
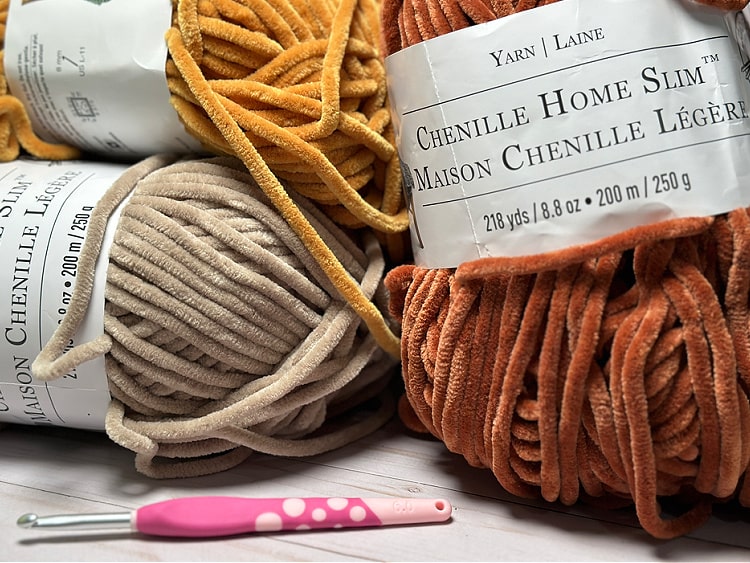
- Super Bulky Chenille Yarn in 2 colors, main color for pumpkin, and brown or green for stem (Samples made with Loops and Threads Chenille Home Slim in Terracotta, Mustard, and Sand)
- J Crochet Hook (6mm)
- Stuffing
- Yarn Needle
- Scissors
Instructions:
These pumpkins are made by starting with a ribbed rectangle, seamed up the side and cinched around the top and bottom, and stuffed to give it the pumpkin shape. Because of the simple beginning shape you can easily adjust the size of the pumpkin by starting with more chains to make it taller or less to make it shorter, and working more rows to make it fatter and less rows to make it skinnier. The smaller orange pumpkin is made following the directions exactly, the adjustments I made for the yellow pumpkin are at the end of the pattern.
The stem is made with a magic ring, pulling a magic ring closed when working with chenille yarn can be tricky. I recommend making your first stitch or two in the ring and then pulling it almost closed, then finish working your stitches in the small ring. If you wait until the end of the first round it is really hard to pull closed. Also make sure you leave a decent length of a tail. If it is too short it will be hard to pull.
Orange Pumpkin
*beginning ch 2 does not count as a stitch
Ch 22
Row 1: hdc in 3rd ch from the hook and each ch to the end (20 hdc)
Row 2: ch 2, turn, hdc in blo of each stitch to the end (20 hdc)
Row 3-25: repeat row 2 (20 hdc)
Fold so that 2 short ends are matched up and slip stitch the ends together to form a tube (you could also cut the yarn and sew the ends together if you prefer, that is how I wrote the original pattern, but with the thick yarn I felt it was easier just to slip stitch it together
You should now have a tube shape, I like to turn my tube inside out so that the slip stitch is now on the inside, but either way is fine.
Along one edge stitch a running stitch all the way around and pull to cinch closes. This will be the bottom of your pumpkin. Stitch in place a few times to secure, pull yarn to center or weave in and clip end.
Thread needle with a piece of yarn and stitch running stitch all the way around the edge of the open end.
Stuff with PolyFil and pull to cinch closed. Stitch in place to secure the top and then stitch up and down a couple of times between the the top and the bottom to pull them slightly in towards the center. This step is optional but I like the look of the top being a little bit sunken in and less round.
Stem
Yellow Pumpkin Variation

No comments :
Post a Comment